OGG Microservices Architecture has been introduced from OGG version 12.3. A kind of architecture mainly designed on the perspective of Cloud operations. So, the older one is now called as Classic Architecture. In this article, I would be explaining about the Installation and Configuration of Oracle GoldenGate Microservices Architecture.
To know more about the OGG Microservices Architecture, you can check the below link,
From OGG 12.3, you will can there would be two different binaries which is as follows,
(i) OGG Microservices Architecture
(ii) OGG Classic Architecture
1. So, you need to download the binary which is with keyword Microservices. I have downloaded the binary in the location /u01/softs

2. Unzip the binary
3. Before installing OGG 12.3. MA, you need to create three directories which are below,
Why you need the above three directories? What is the need of it?
/u01/app/ogg/ogg123_ma is OGG_HOME
/u01/app/ogg/ogg123_sm is  Service Manager Home
/u01/app/ogg/ogg123_deploy is Deployment Home
4. Now, navigate to the directory where binary is stored.
5. Navigate to the below directory and run the runInstaller file to start the installation of OGG.
6. Now execute the runInstaller to start the installation wizard,
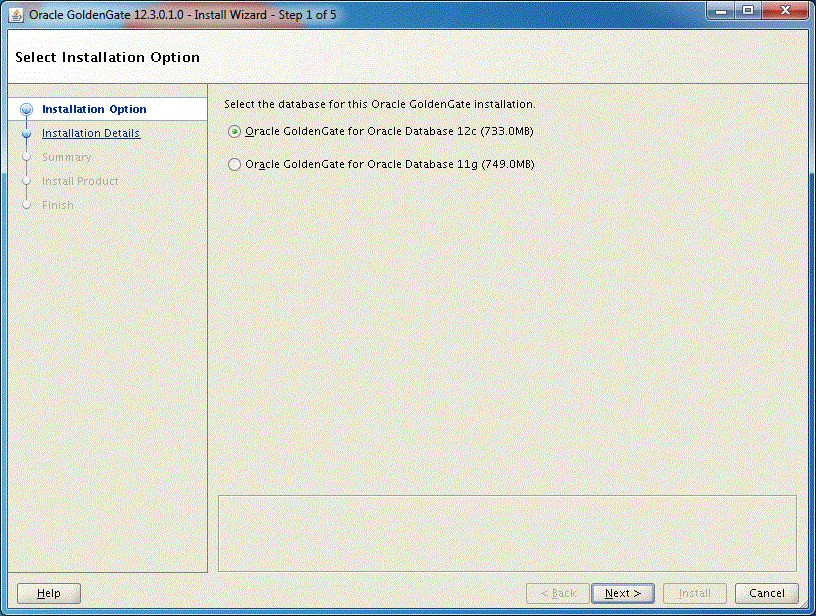
7. Choose option according to your database version and click next. Here, I have installed Oracle Database 12c and hence I have selected the Oracle 12c option.
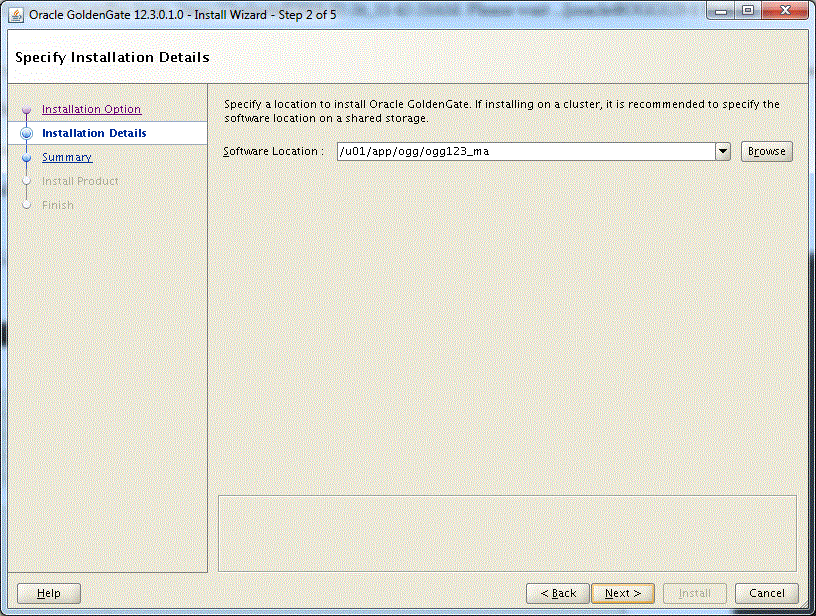
8. Choose software location. This is OGG HOME /u01/app/ogg/ogg123_ma
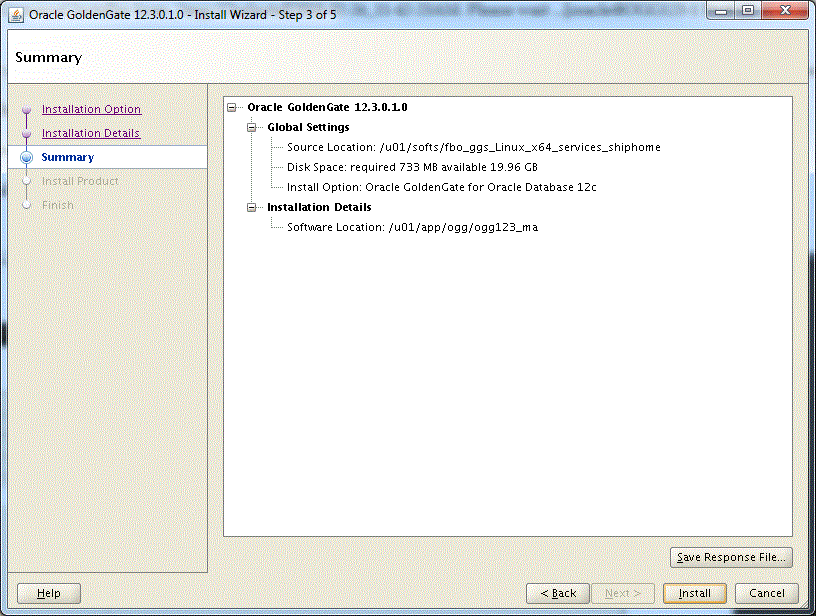
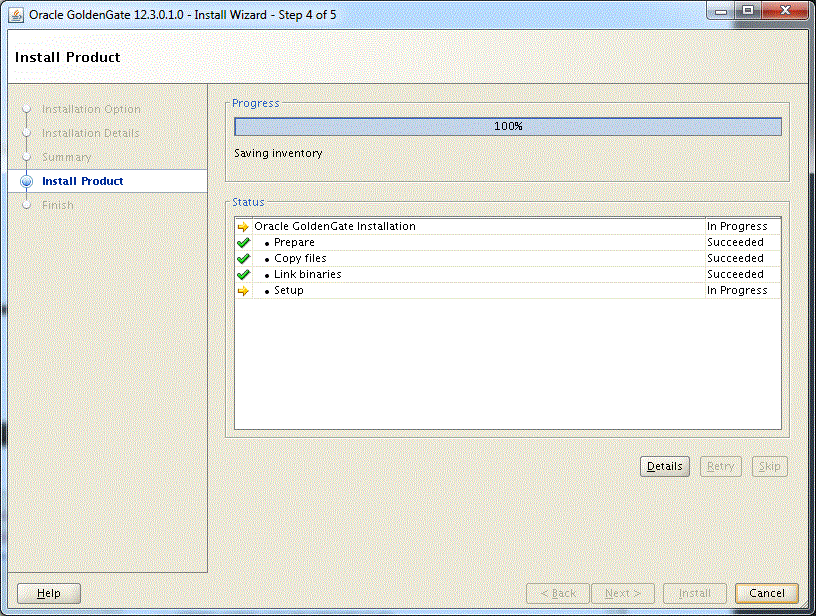
9. Save a response file if required and then click Install
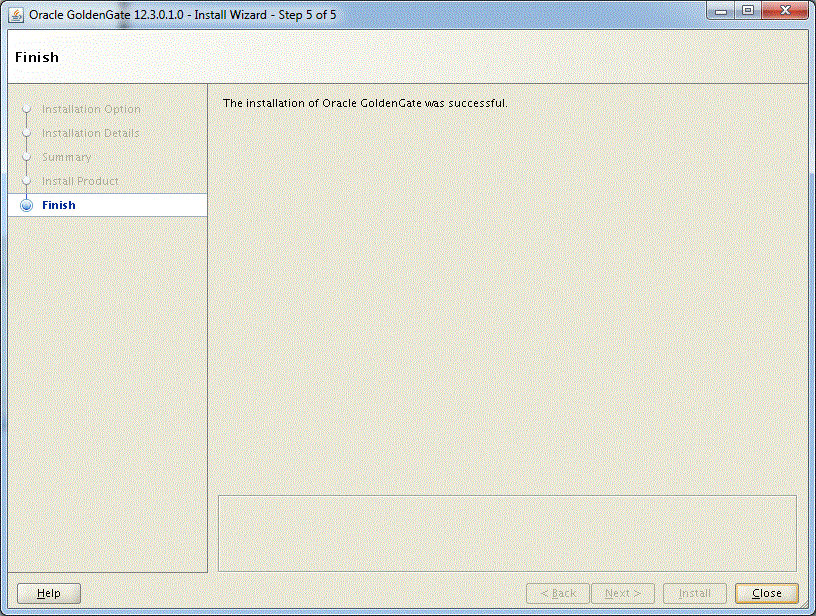
10. When it is successfully Installed, you will see the following
11. Oracle GoldenGate for Microservices is installed now. If you want to see the logs for the installation, you can get it from below location,
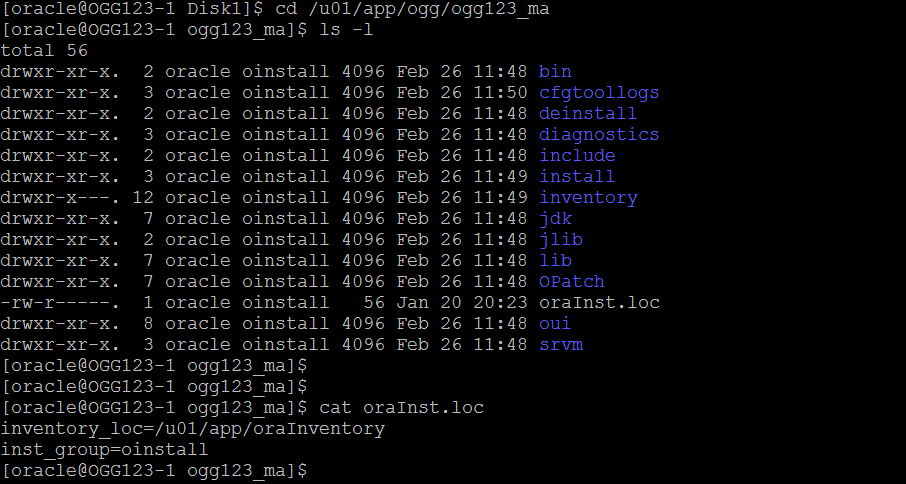
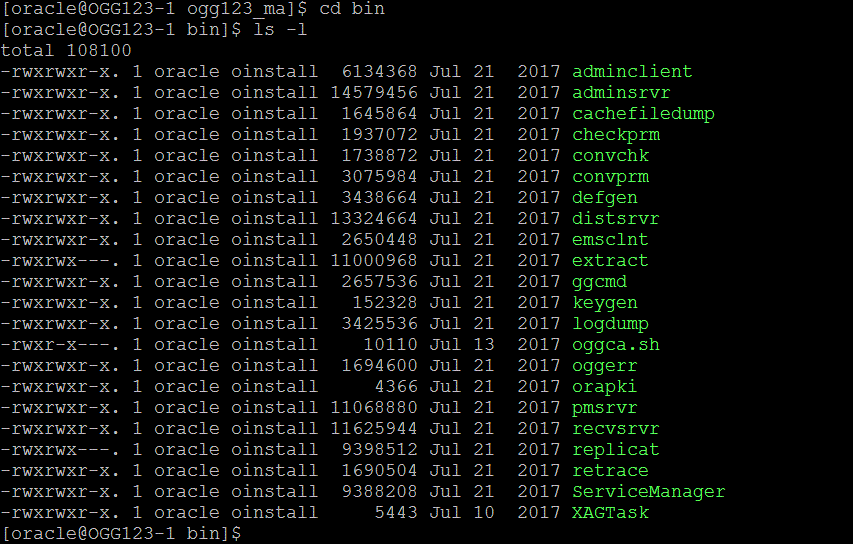
Understanding the installed binaries.
Files under the bin directory,
——————————————————–DEPLOYING OGG MICROSERVICES——————————————————–
Setting Environment Variables
[oracle@OGG123-1 ~]$ export ORACLE_HOME=/u01/app/oracle/product/12.1.0/dbhome_1[oracle@OGG123-1 ~]$ export ORACLE_SID=ORCL
[oracle@OGG123-1 ~]$ export LD_LIBRARY_PATH=$ORACLE_HOME/lib:$LD_LIBRARY_PATH
[oracle@OGG123-1 ~]$ TNS_ADMIN=$ORACLE_HOME/network/admin
[oracle@OGG123-1 ~]$ export OGG_HOME=/u01/app/ogg/ogg123_ma
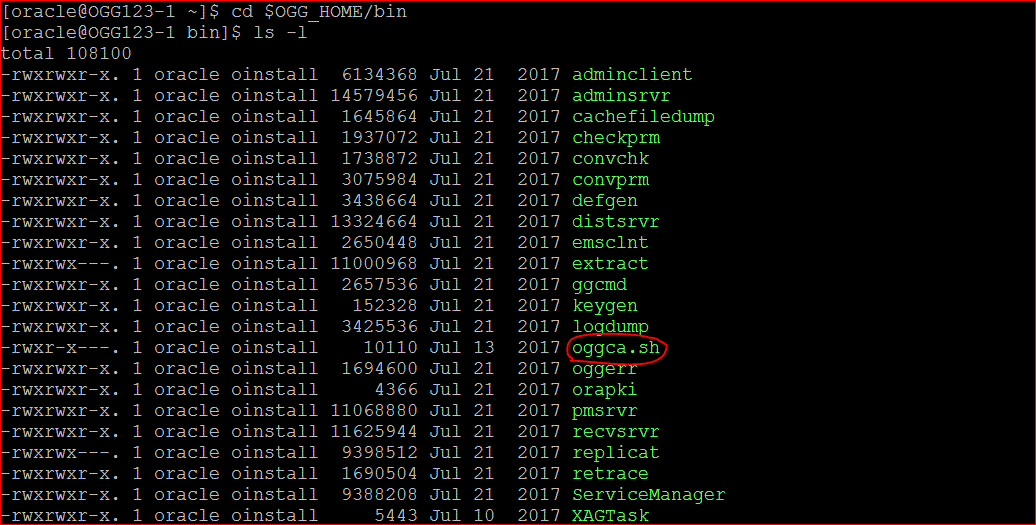
oggca.sh script under $OGG_HOME/bin will help to deploy OGG services for MA.
[oracle@OGG123-1 bin]$ ./oggca.sh
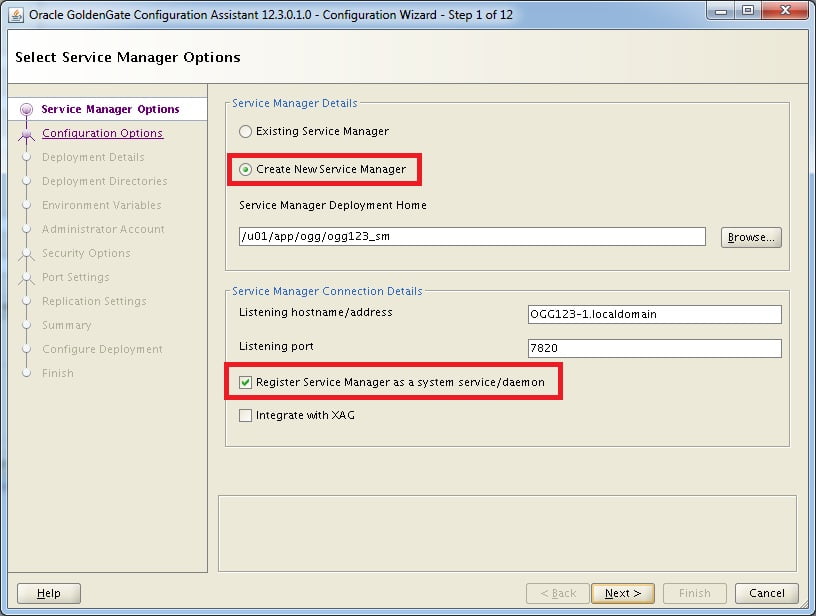
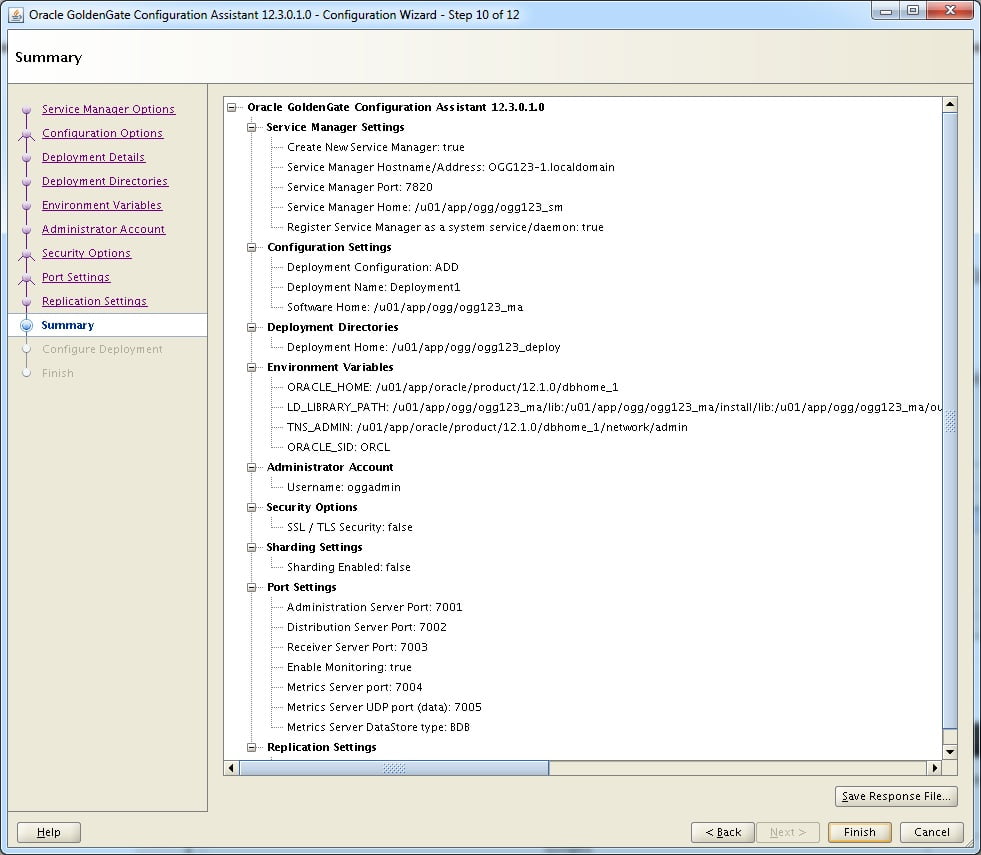
1. Configure Service Manager. The location of Service manager is /u01/app/ogg/ogg123_sm
2. If you want to register as a service check the box Register Service Manager as a system service/daemon
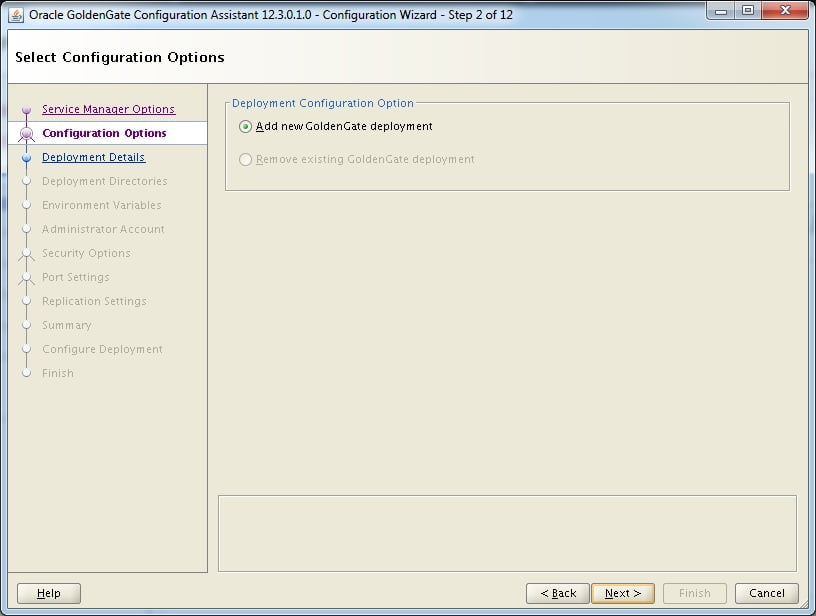
3. Click on Add new deployment.
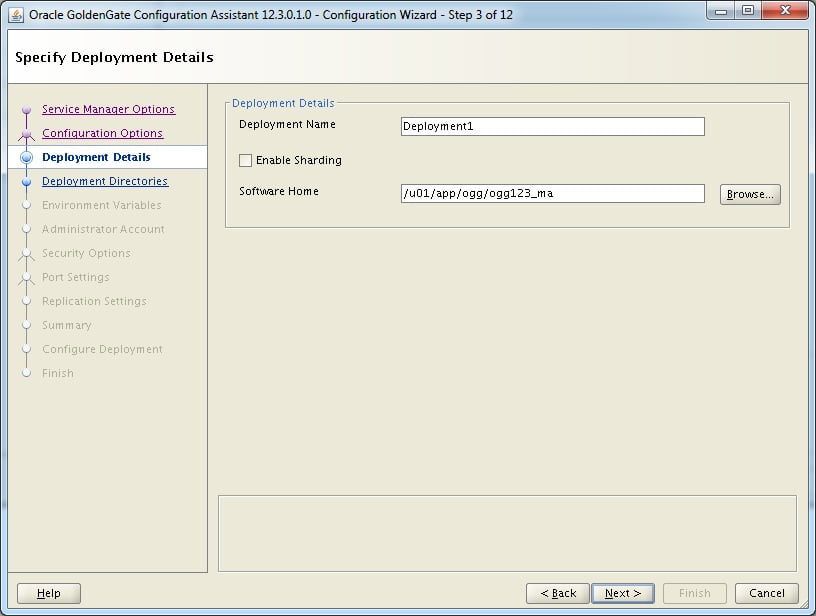
4. Give a name to deployment and software home will be OGG HOME.
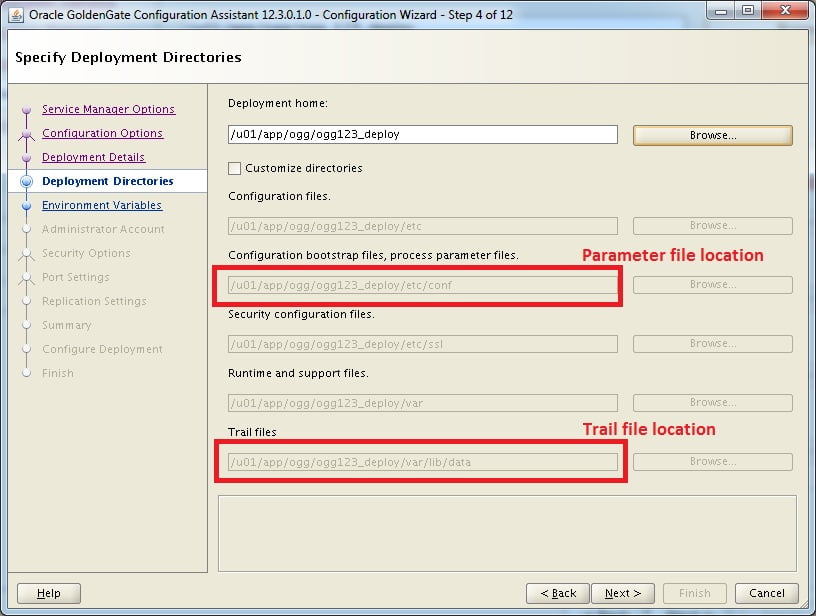
5. Provide a deployment home. We chose /u01/app/ogg/ogg123_deploy
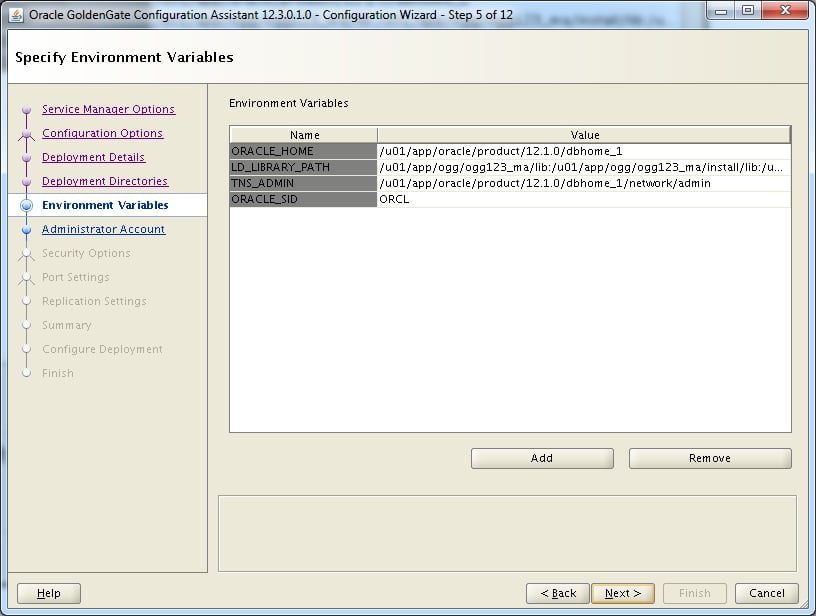
6. Set the environment variables if you have not set it before invoking oggca.sh
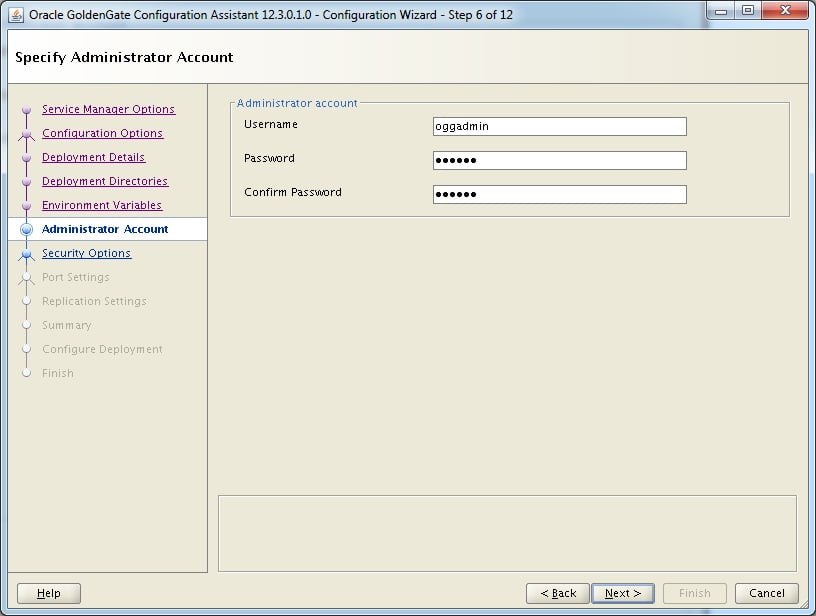
7. Set the username and password for Service manager and Services Server logins as oggadmin/oggadmin
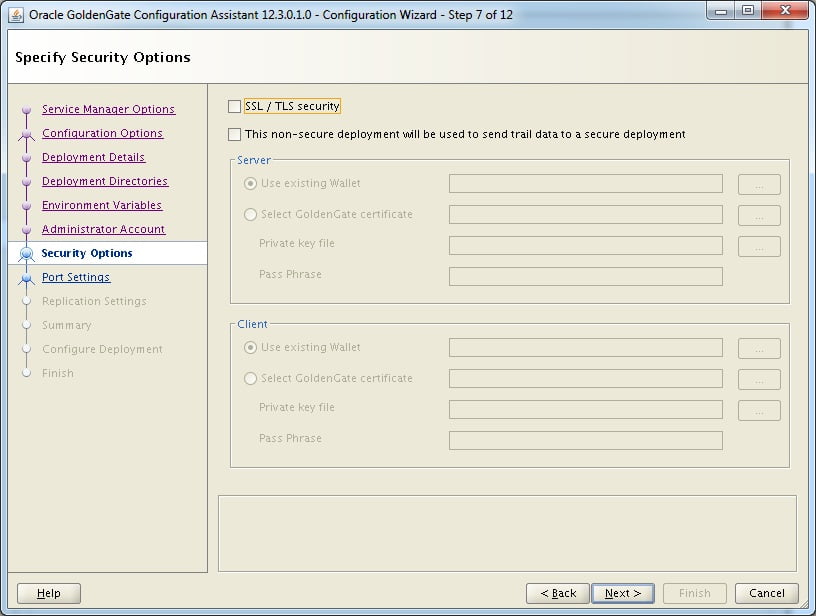
8. Uncheck the SSL/TLS checkbox. If you have the SSL/TLS certificate created, then check the box. For this demo, uncheck the box
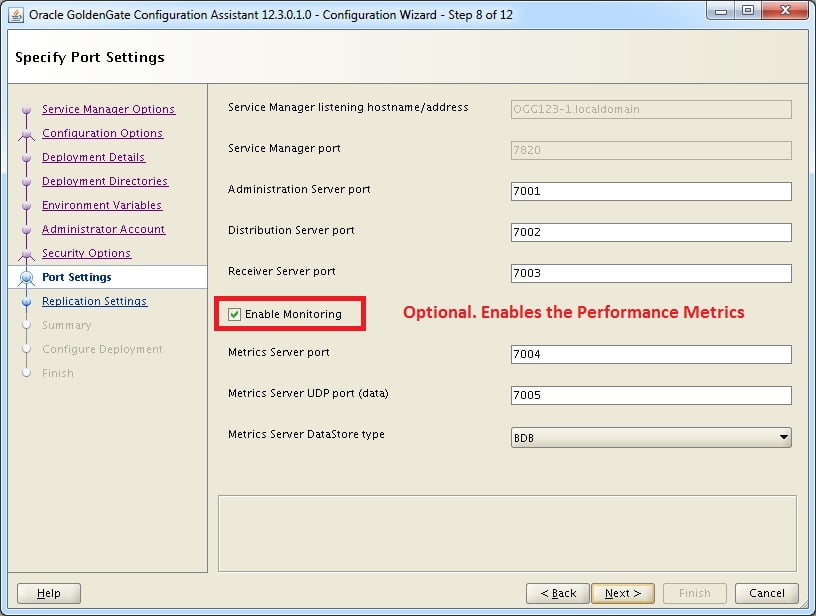
9. Choose the administration server port. If you click on Distribution port it will be automatically set to next port. Eg; If you set admin server 7001, Distribution server will be 7002 and son on.
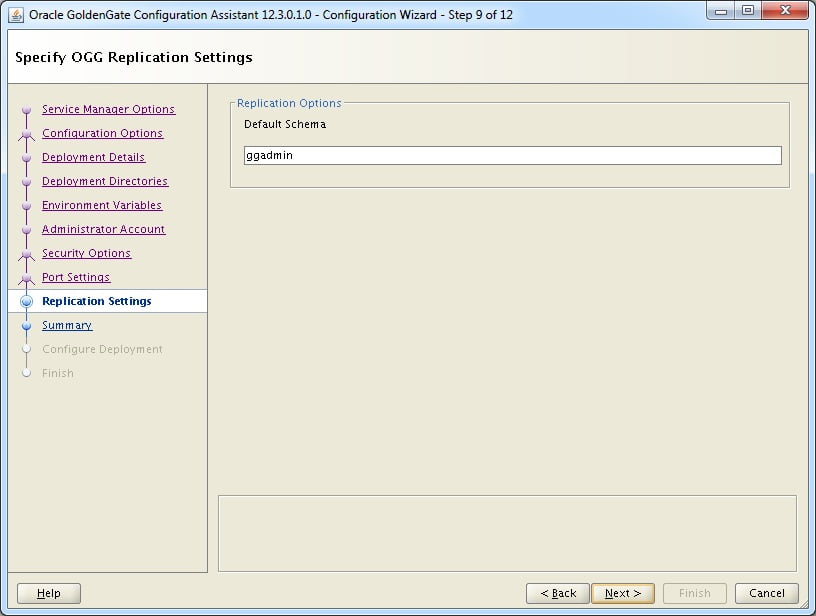
10. Set default schema to add in GLOBALS file ggchema parameter
11. Save the response file if required. Also review all the port numbers and environmental variables before proceeding and ensure that they are correct.
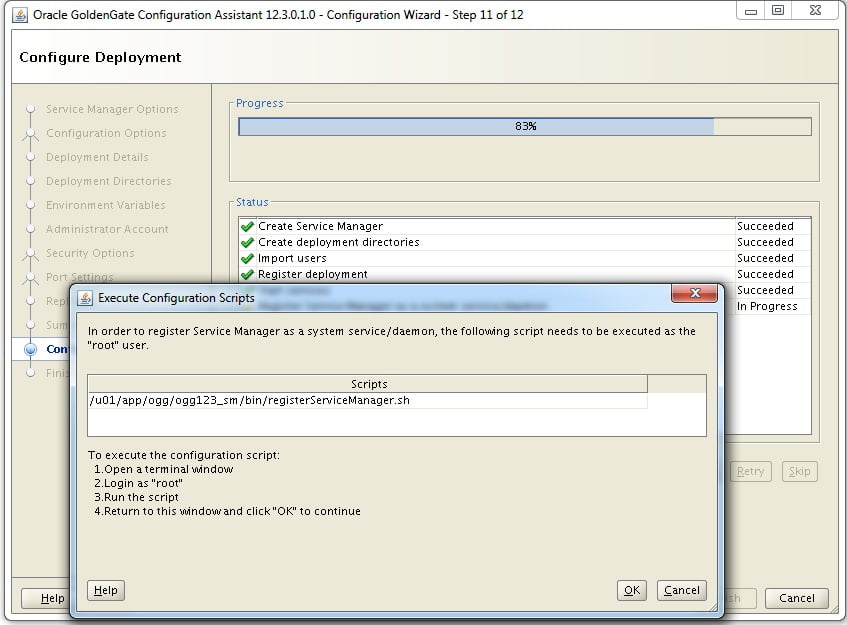
12. Click finish to complete the deployment. You will be prompted to run the servicemanager.sh script as root
13. Run the script and click OK.
[root@OGG123-1 ~]# sh /u01/app/ogg/ogg123_sm/bin/registerServiceManager.sh
———————————————————————————-
Oracle GoldenGate Install As Service Script
———————————————————————————-
OGG_HOME=/u01/app/ogg/ogg123_ma
OGG_CONF_HOME=/u01/app/ogg/ogg123_sm/etc/conf
OGG_USER=oracle
Running OracleGoldenGateInstall.sh…
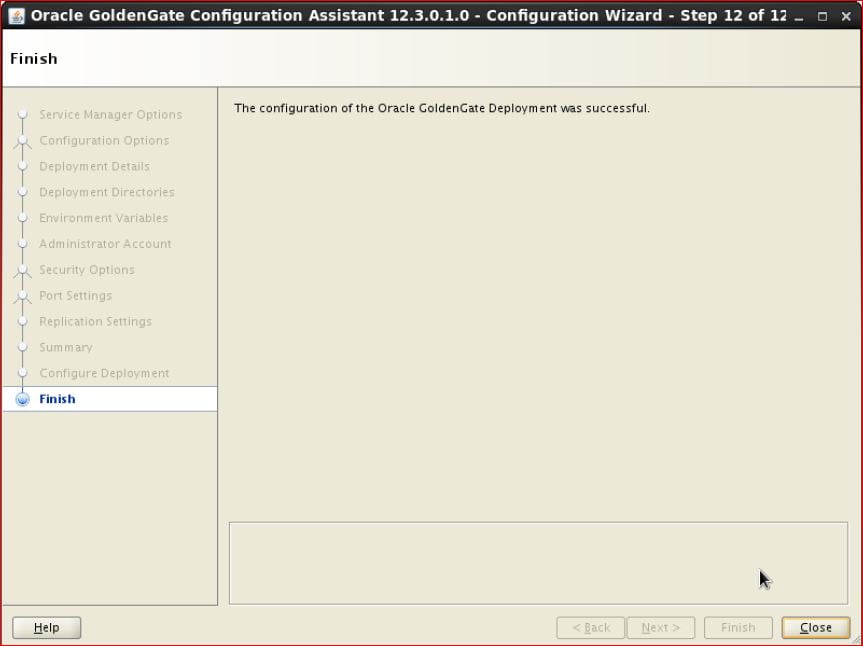
14. The configuration of OGG deployment is completed.
15. Now the Service Manager is started
——————————————————–CONFIGURING OGG FOR MICROSERVICES——————————————————–
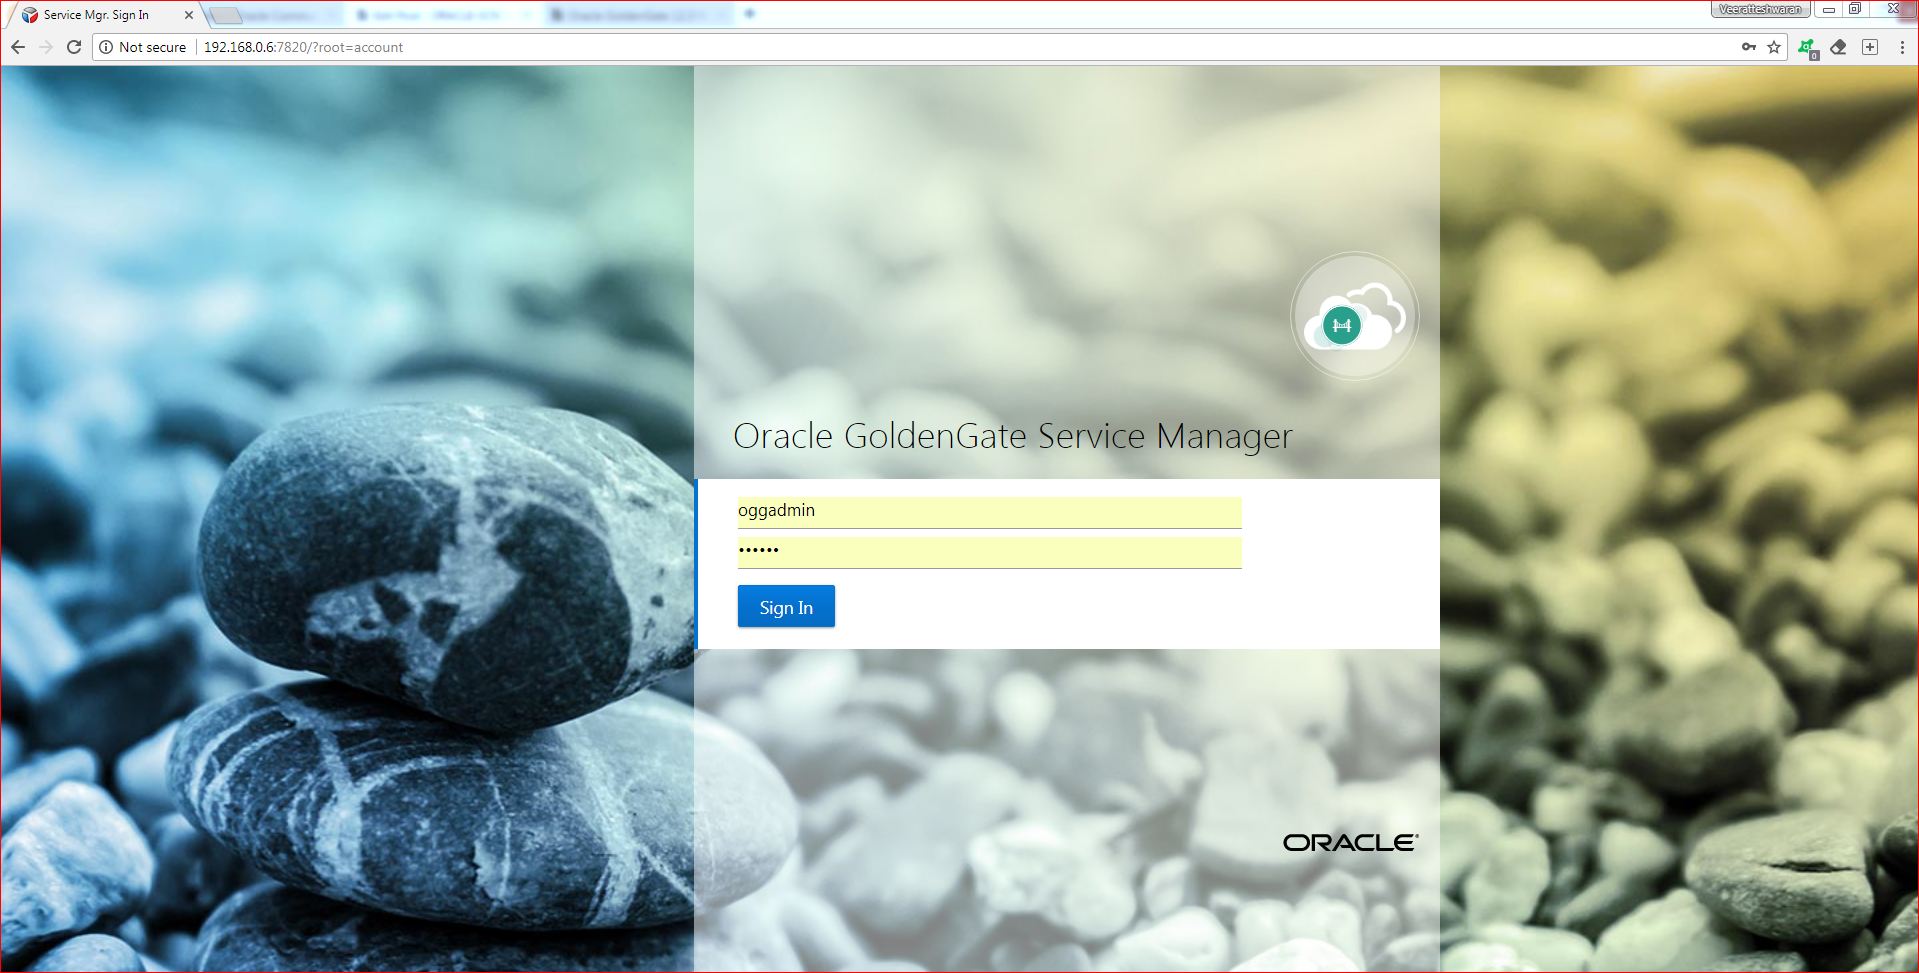
1. Open web browser and enter below URL to open Service manager console. /u01/app/ogg/ogg123_sm
http://localhost:7820
Since I am opening the Service Manager console from the remote machine, I have used the IP address. If you are opening it in the same machine, then you can use the “localhost”
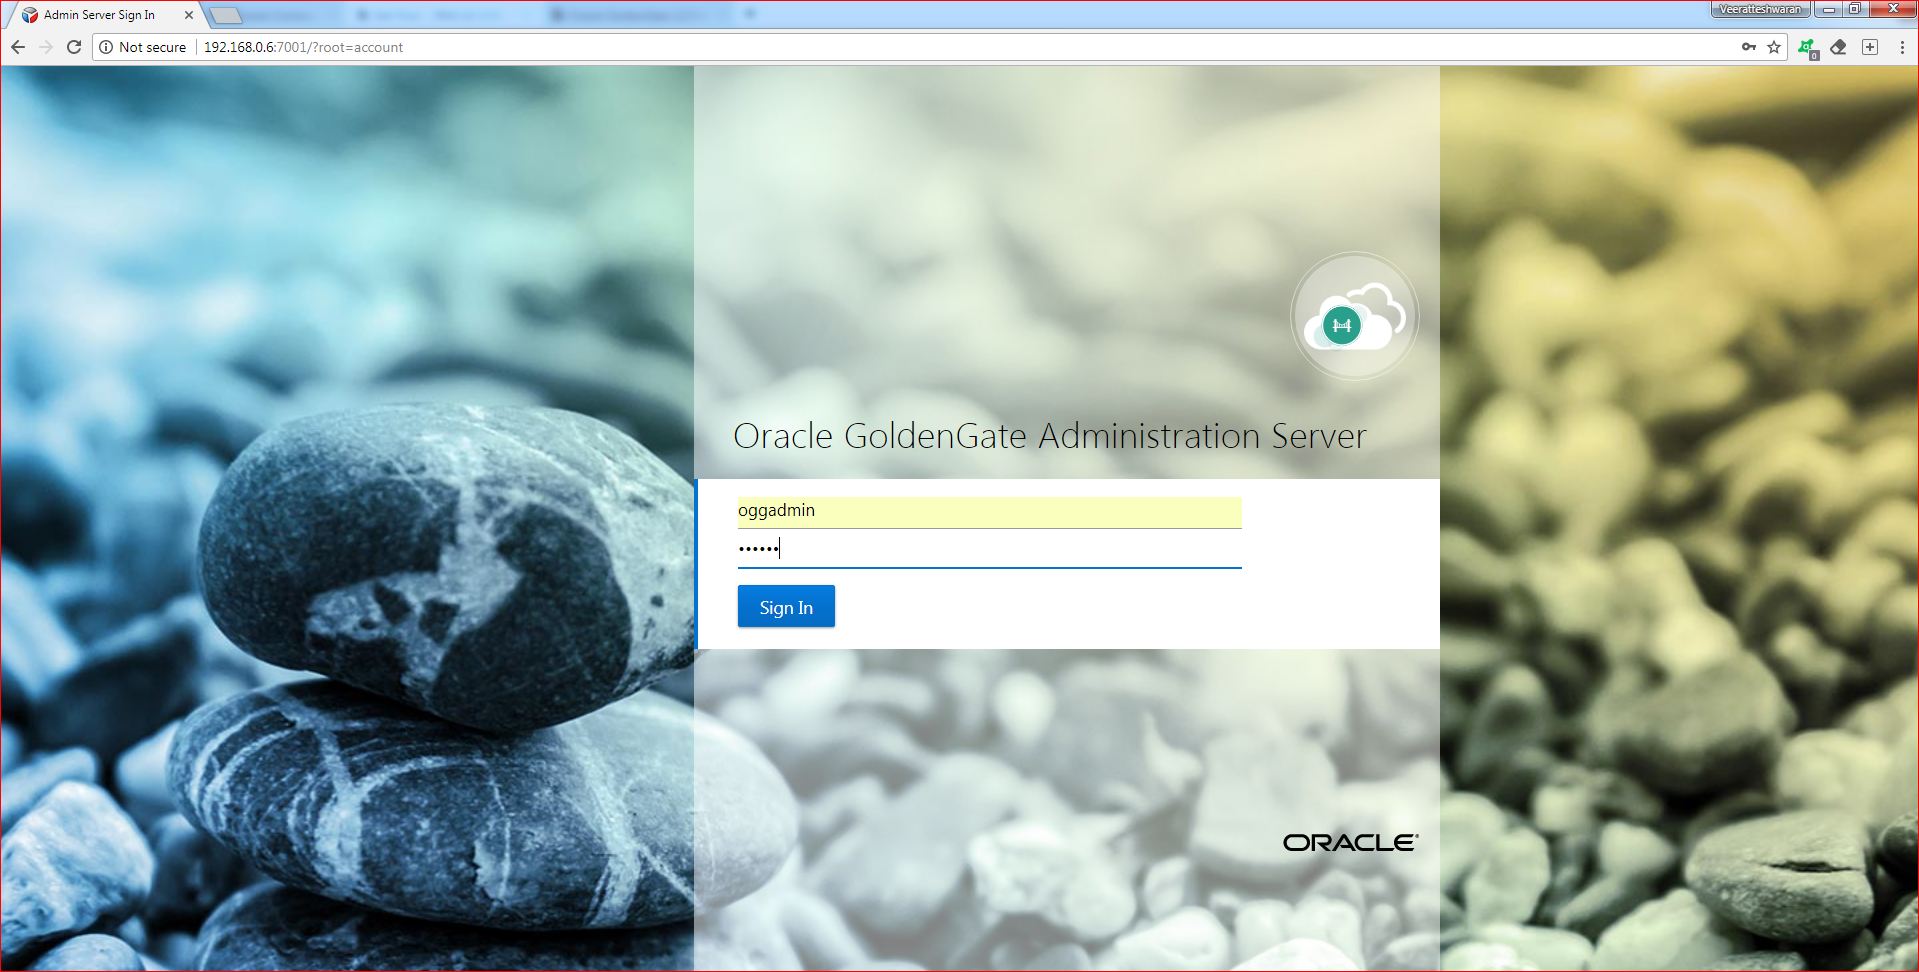
2. Enter the username and password as oggadmin
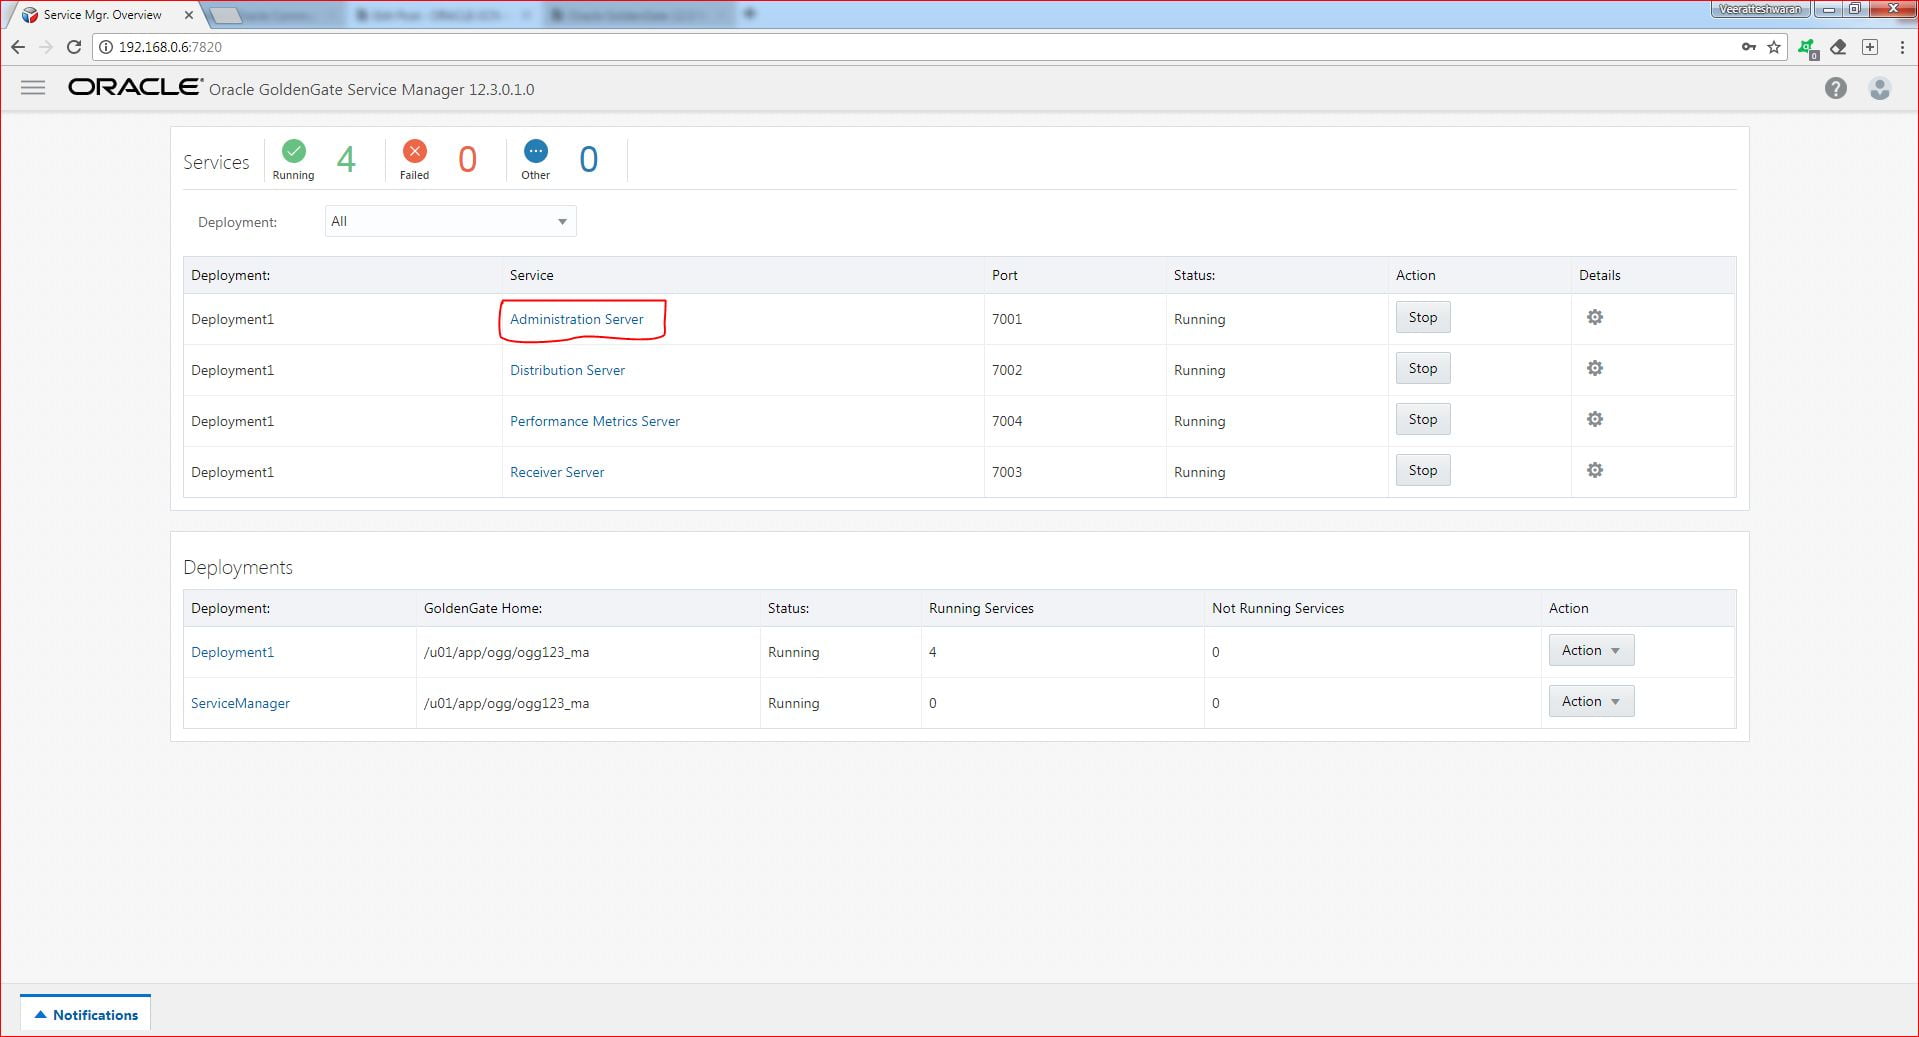
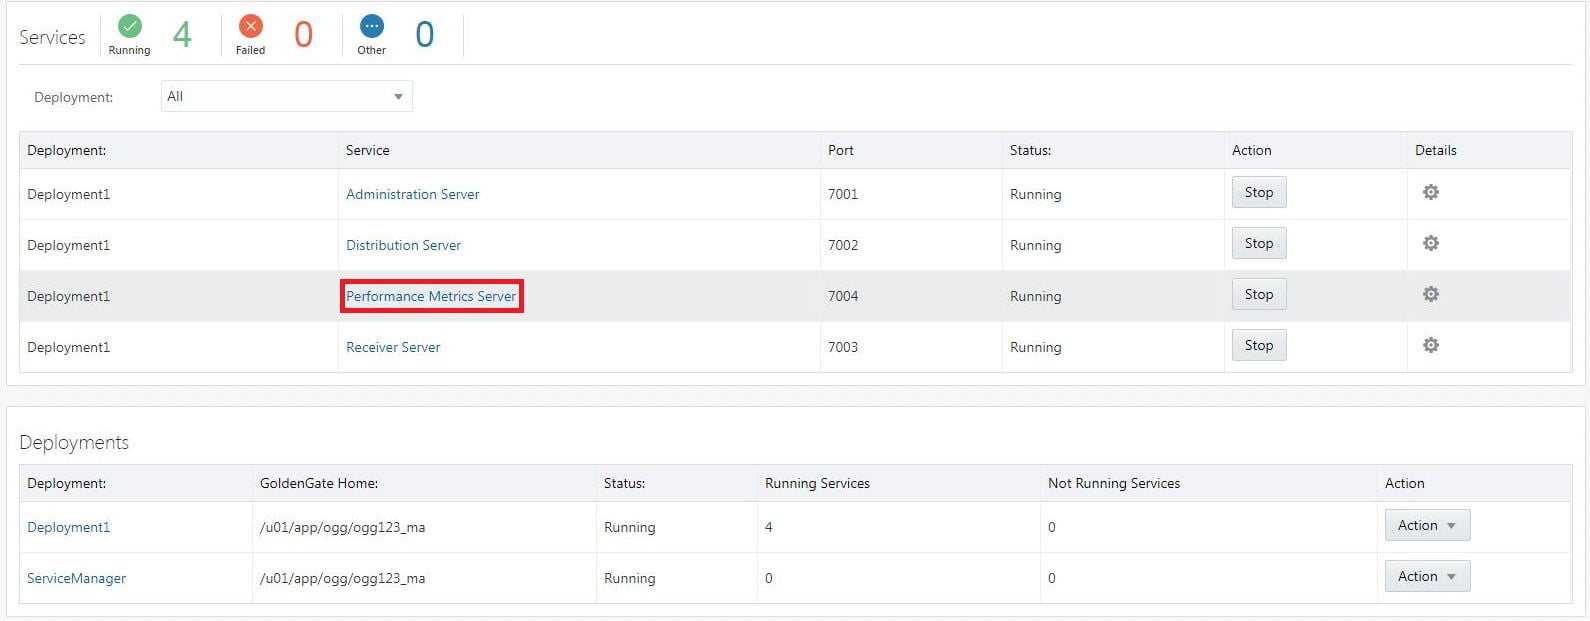
3. This will show the service manager which has all the service under it.
1. Administration Server
2. Distribution Server
3. Receiver Server
4. Performance Metrics Server
——————————————————-PREPARING THE DATABASE FOR ORACLE GOLDENGATE——————————————————–
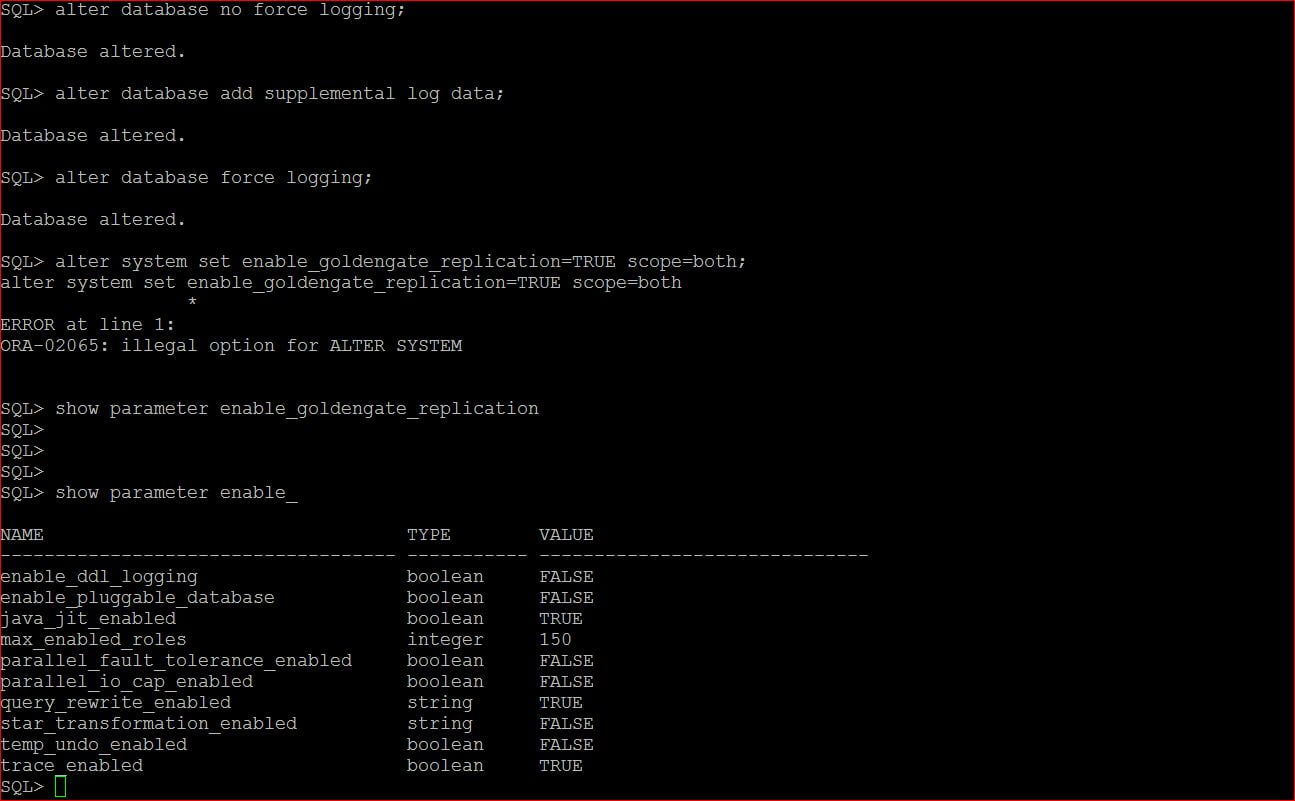
1. Enable database level supplemental logging
2. Force logging should be set to TRUE
3. ENABLE_GOLDENGATE_REPLICAT should be set to true
SQL> select supplemental_log_data_min , force_logging, log_mode, cdb from v$database;

SQL> alter database add supplemental log data;
SQL> alter database force logging;
SQL> alter system set enable_goldengate_replication=TRUE;
The parameter ENABLE_GOLDENGATE_REPLICATION is not present in the Oracle 12c database and hence it has thrown the error. Please ignore it.
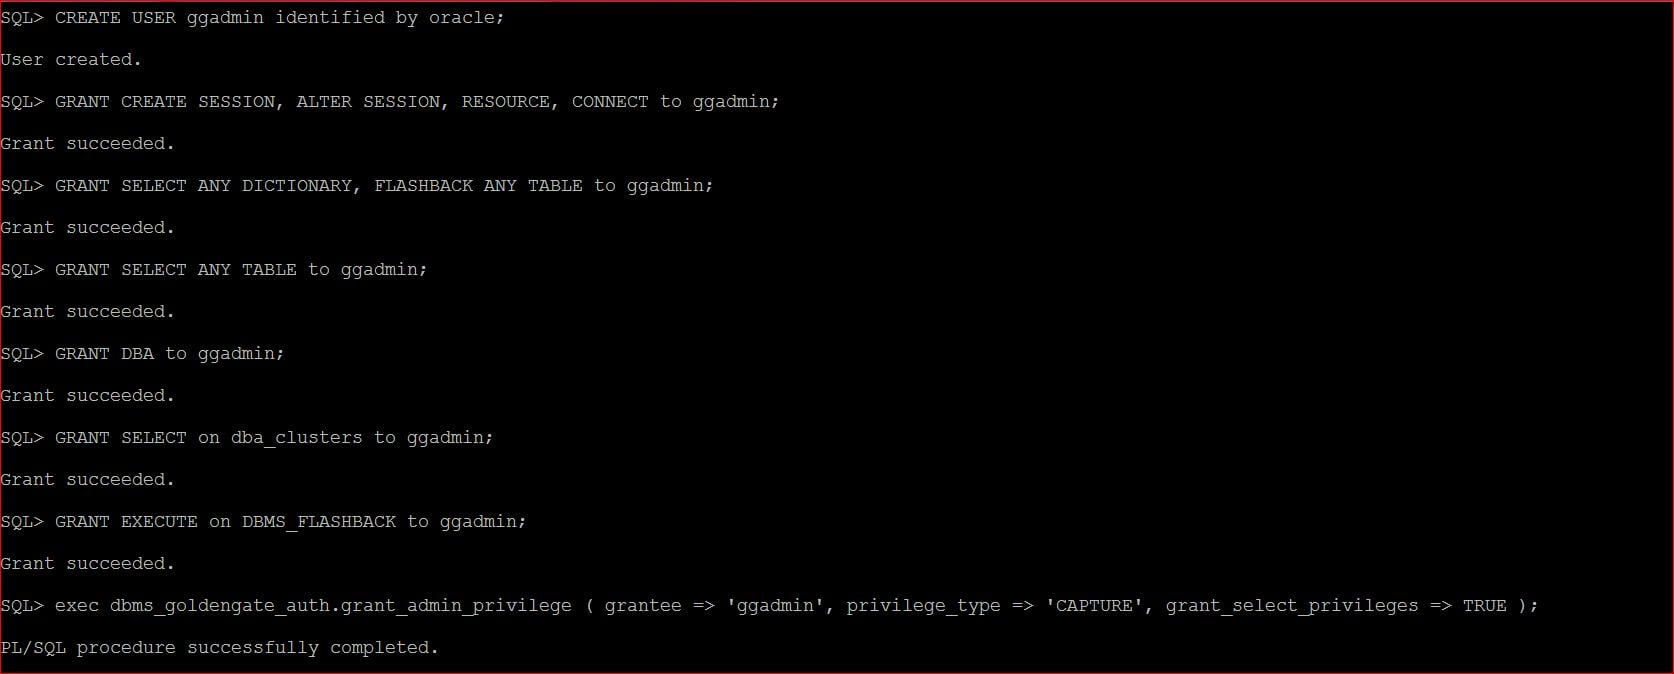
4. Create ggadmin user
CREATE USER ggadmin identified by oracle;
GRANT CREATE SESSION, ALTER SESSION, RESOURCE, CONNECT to ggadmin;
GRANT SELECT ANY DICTIONARY, FLASHBACK ANY TABLE to ggadmin;
GRANT SELECT ANY TABLE to ggadmin;
GRANT DBA to ggadmin;
GRANT SELECT on dba_clusters to ggadmin;
GRANT EXECUTE on DBMS_FLASHBACK to ggadmin;
exec dbms_goldengate_auth.grant_admin_privilege ( grantee => 'ggadmin', privilege_type => 'CAPTURE', grant_select_privileges => TRUE );
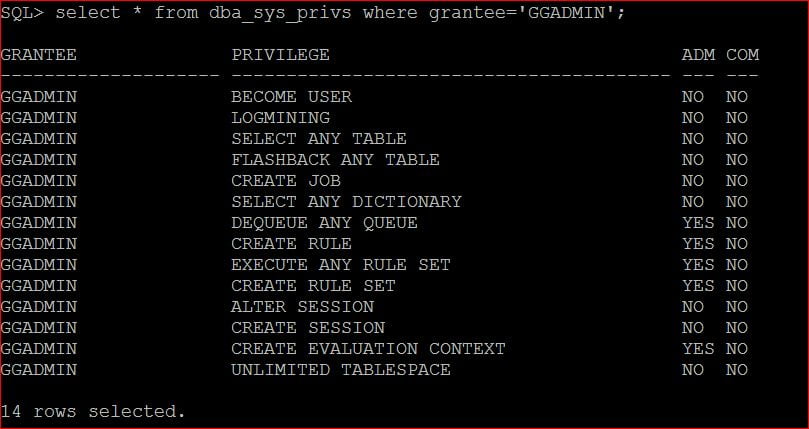
SQL> select * from dba_sys_privs where grantee=’GGADMIN’;
5. Creating source user
Create user source identified by oracle;
Grant connect, resource, create session, alter session to source;
Grant unlimited tablespace to source;
6. Creating target user
Create user target identified by oracle;
Grant connect, resource, create session, alter session to target;
Grant unlimited tablespace to target;
——————————————————–CONFIGURE EXTRACT AND REPLICAT PROCESSES——————————————————–
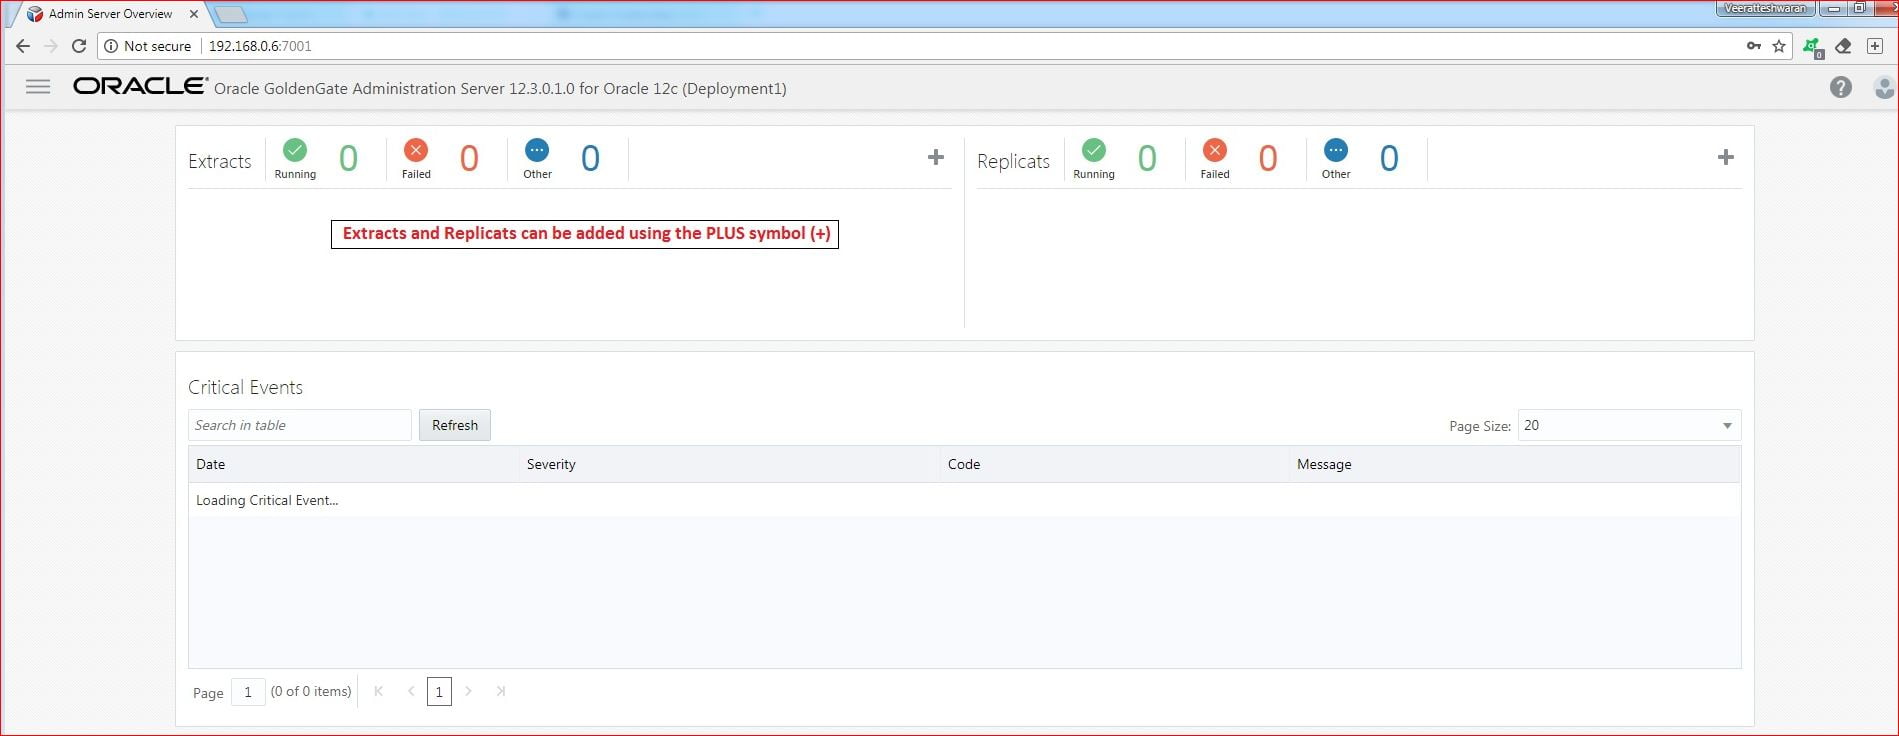
1. Already we have opened the Service Manager console. Click on Administration Server to configure extract/replicat process.
Note: Each and every Services has it’s own login page for it.
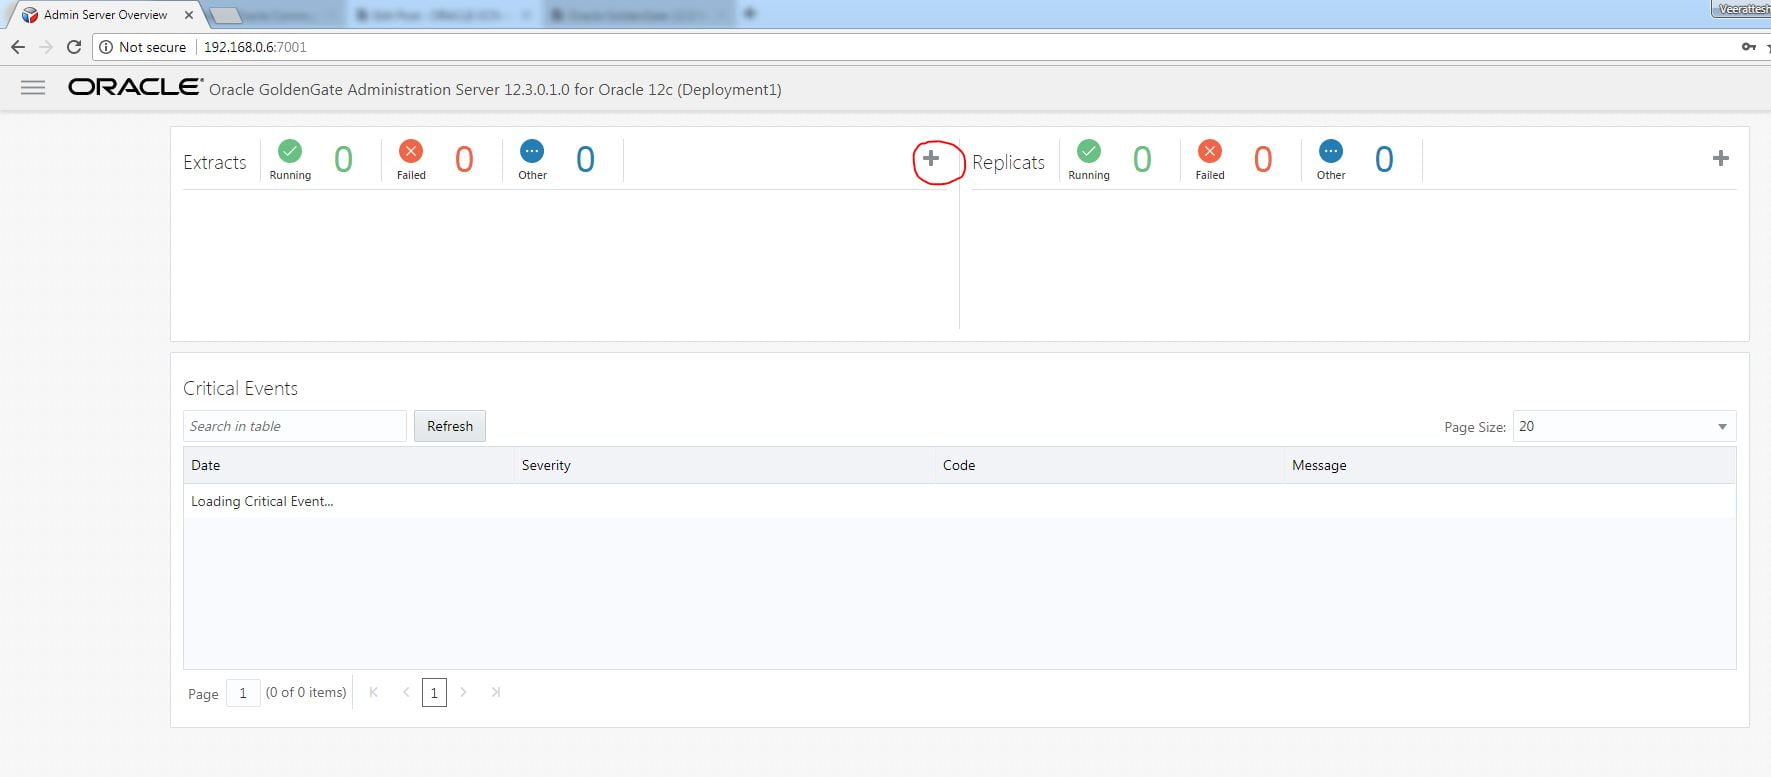
2. Click on the + symbol to add an Extract process.
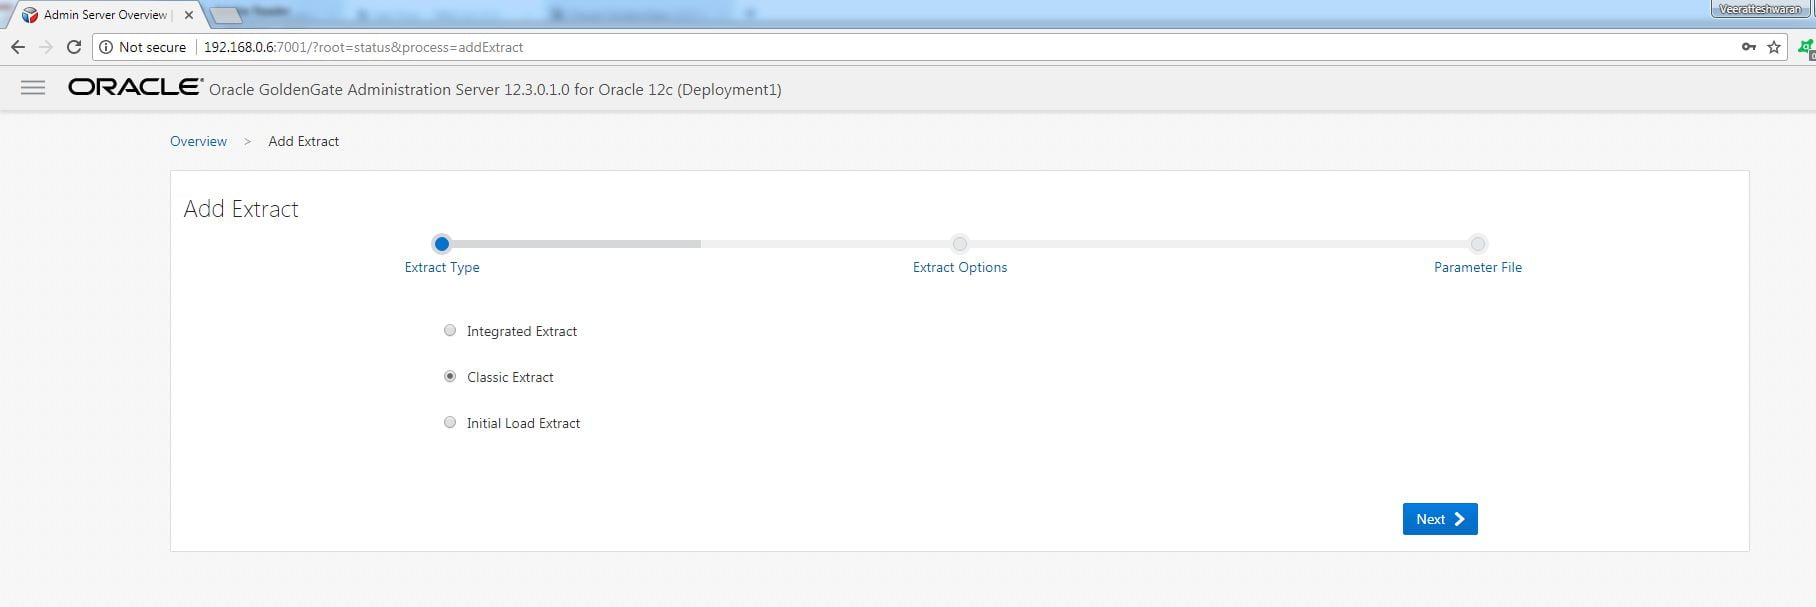
3. Select the type of Extract you need to add.
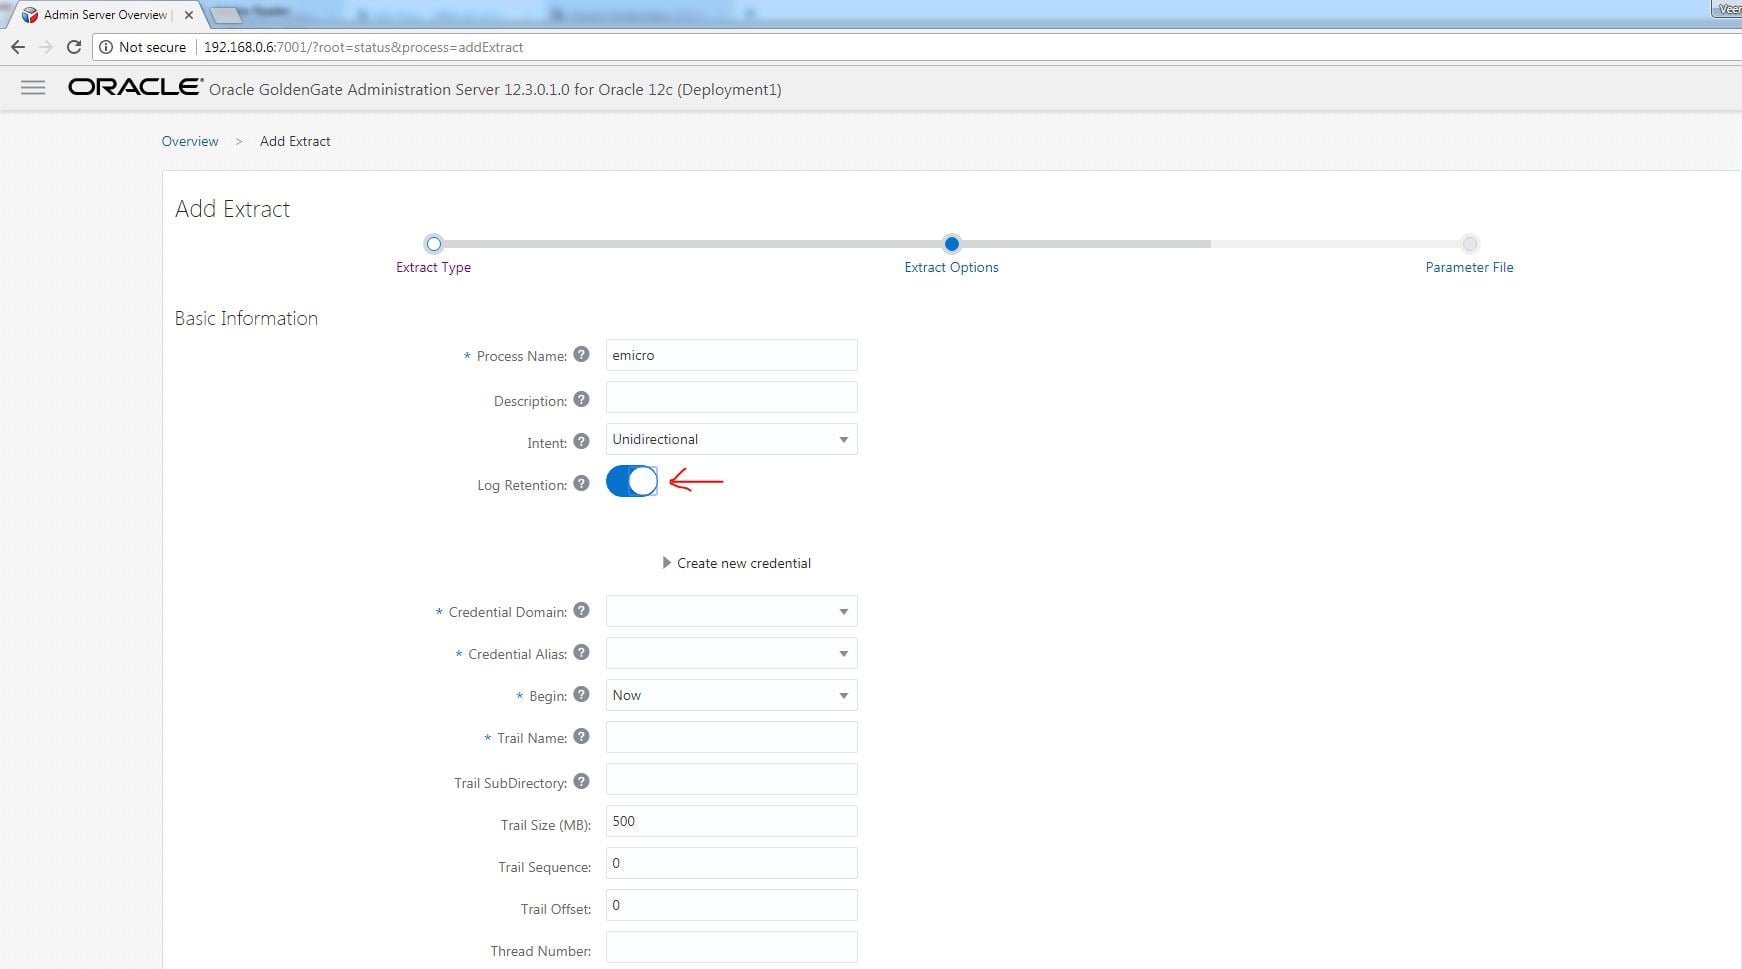
4. Enter the extract name and enable log retention if you want to register the extract with RMAN. This makes the RMAN to retain the log files required by extract process
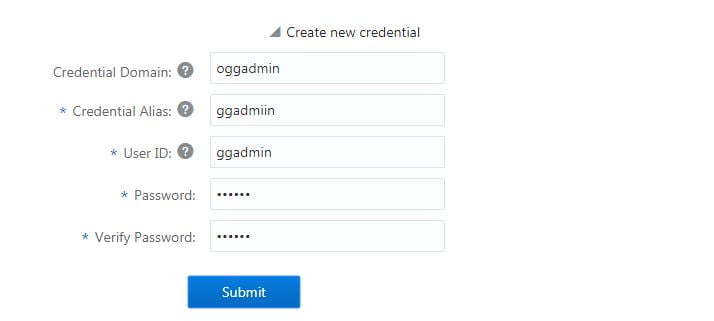
5. In Microservices Architecture, normal userid dblogin is not supported. The default login is using alias stored in credentialstore. First add credentialstore, enter the username details and click submit.
6. Enter the domain and alias that was created in previous step. Give a name to trail file and Click Next.
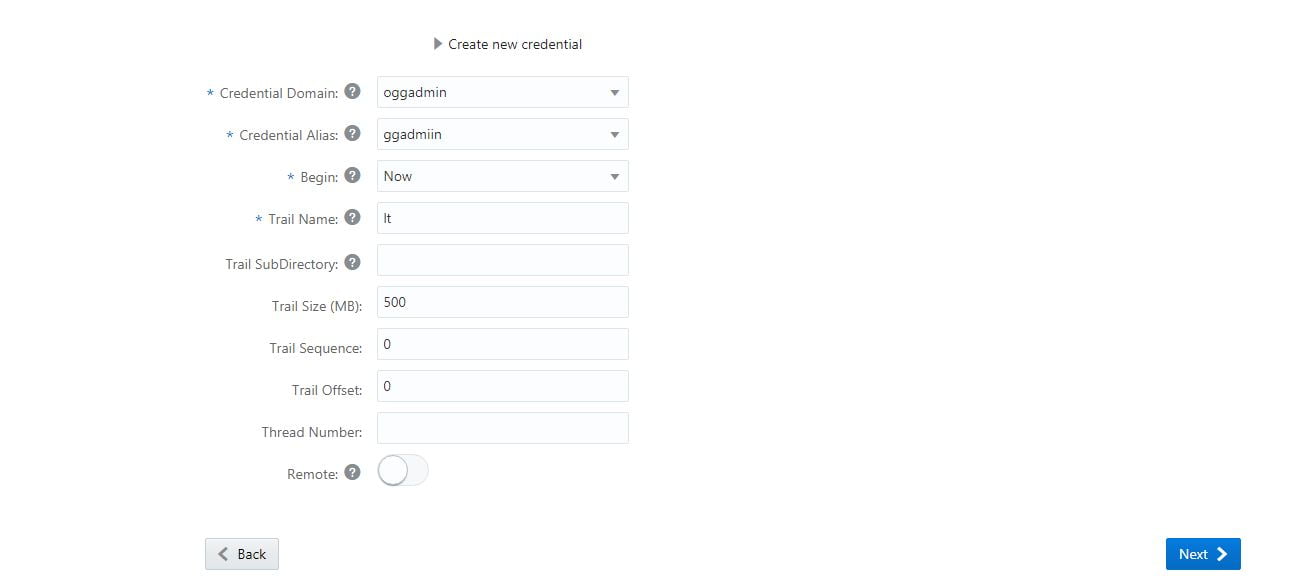
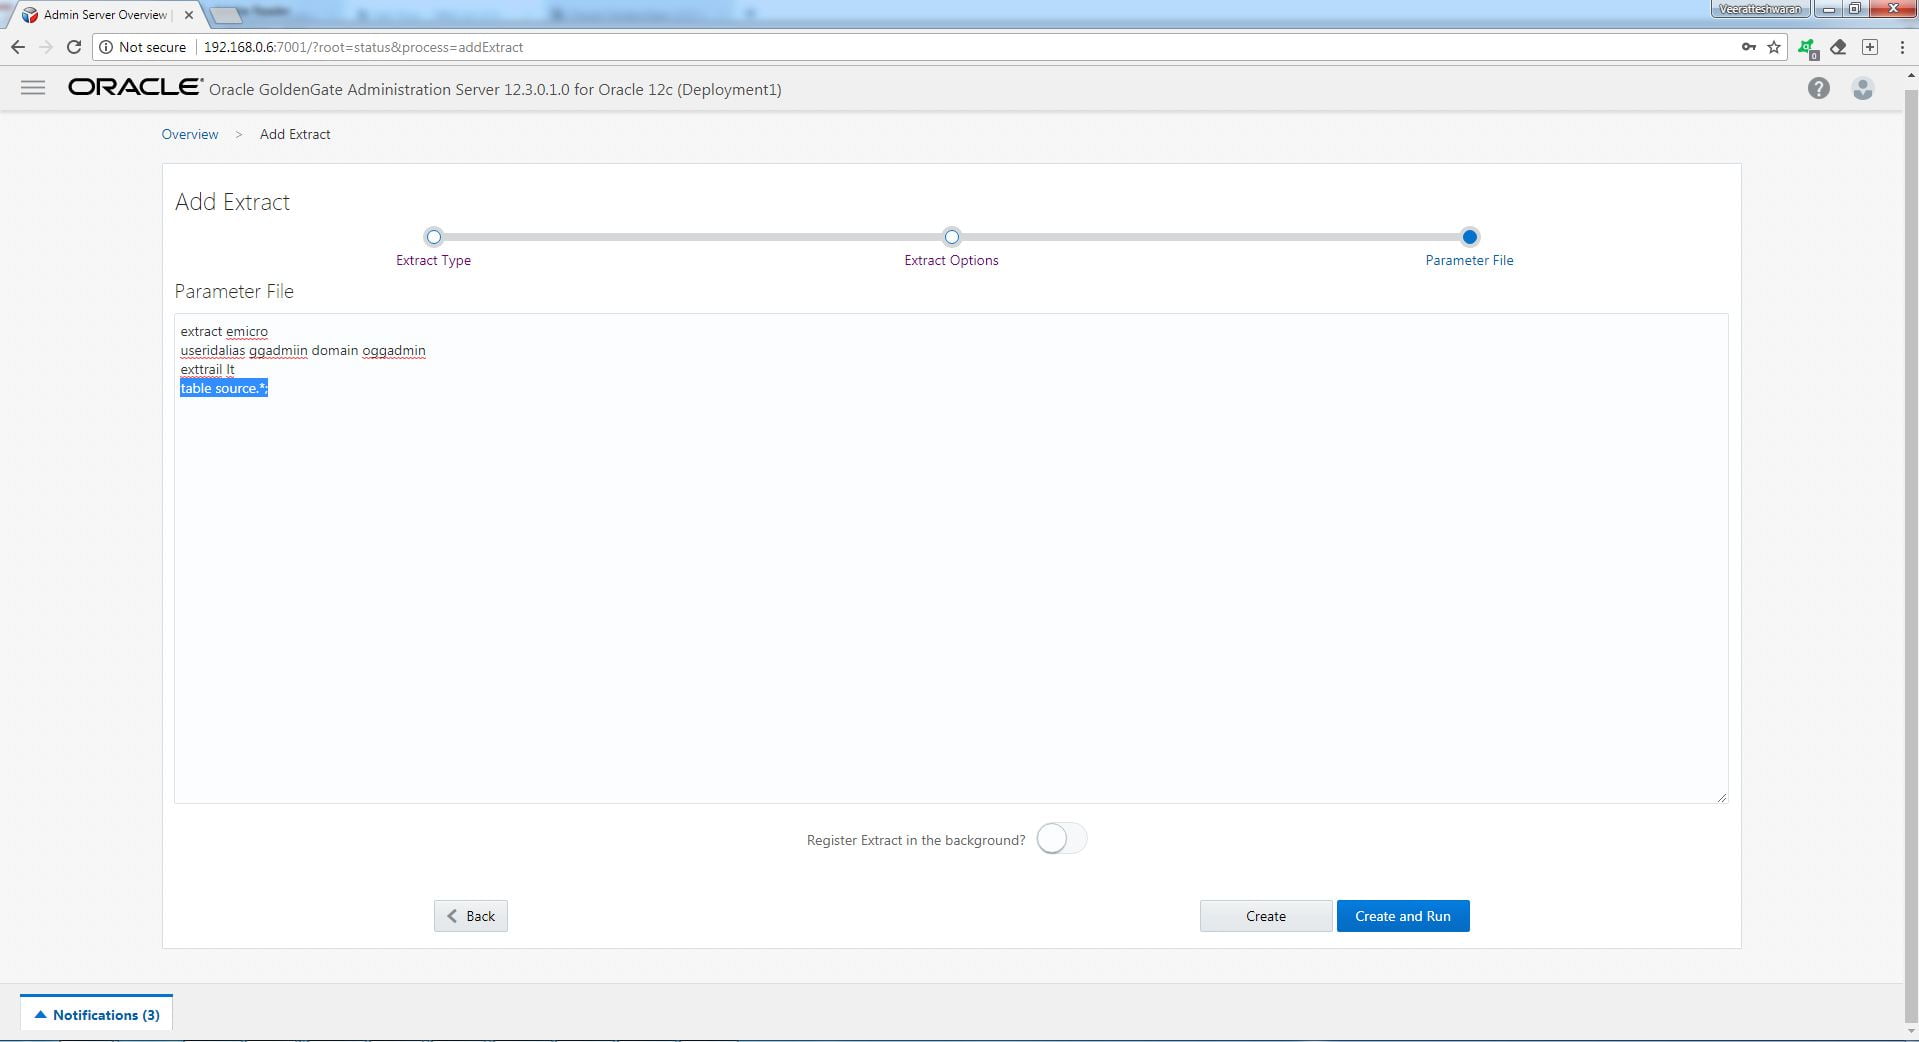
7. This will show the parameter file. Add the tables which you want to capture. We have added all tables under schema source. Now click the button “Create and Run”.
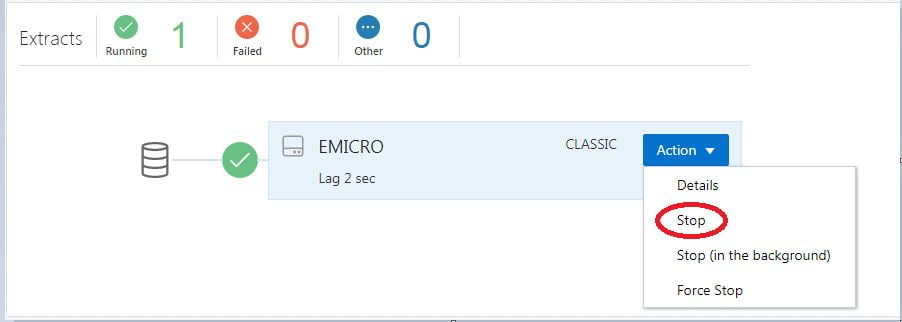
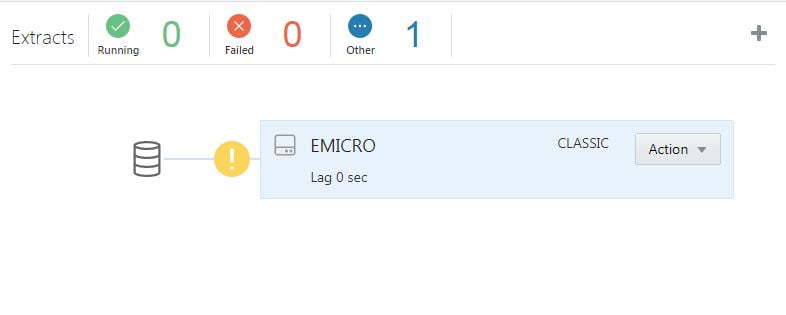
Now classic extract is added and started.
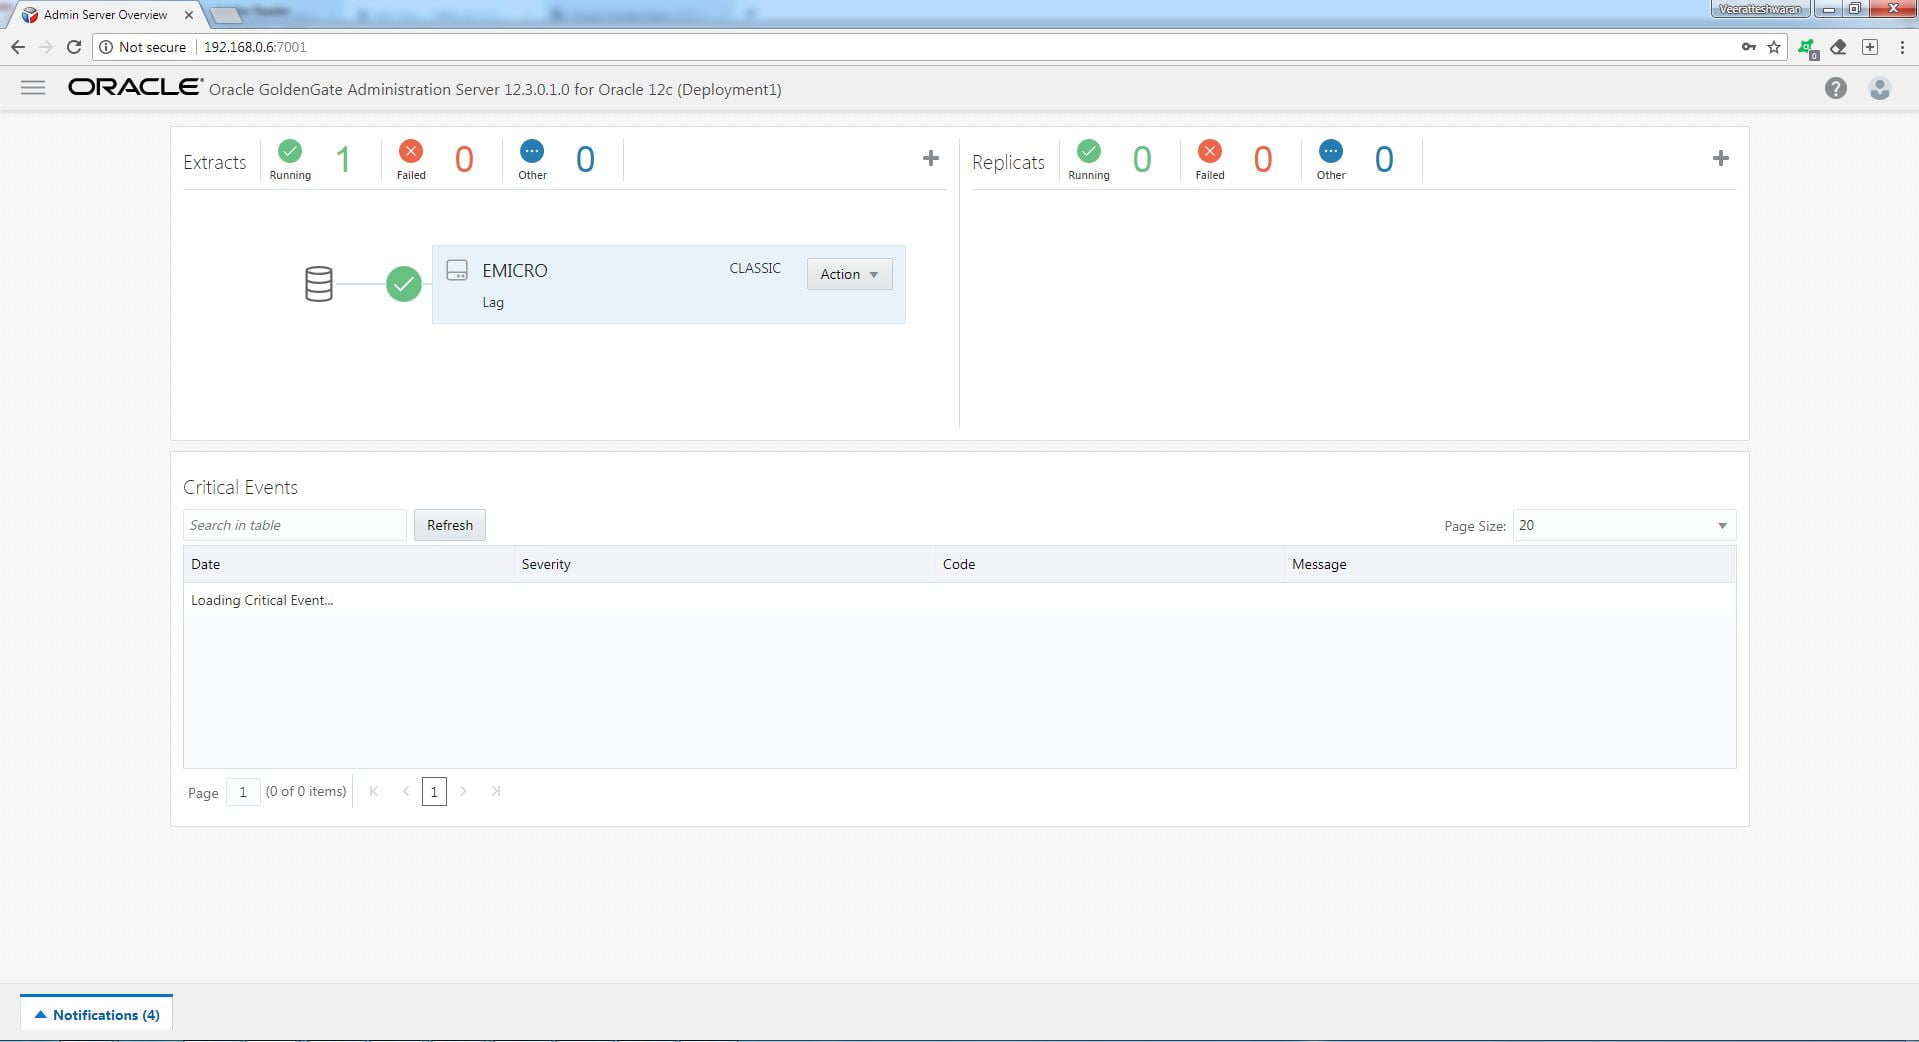
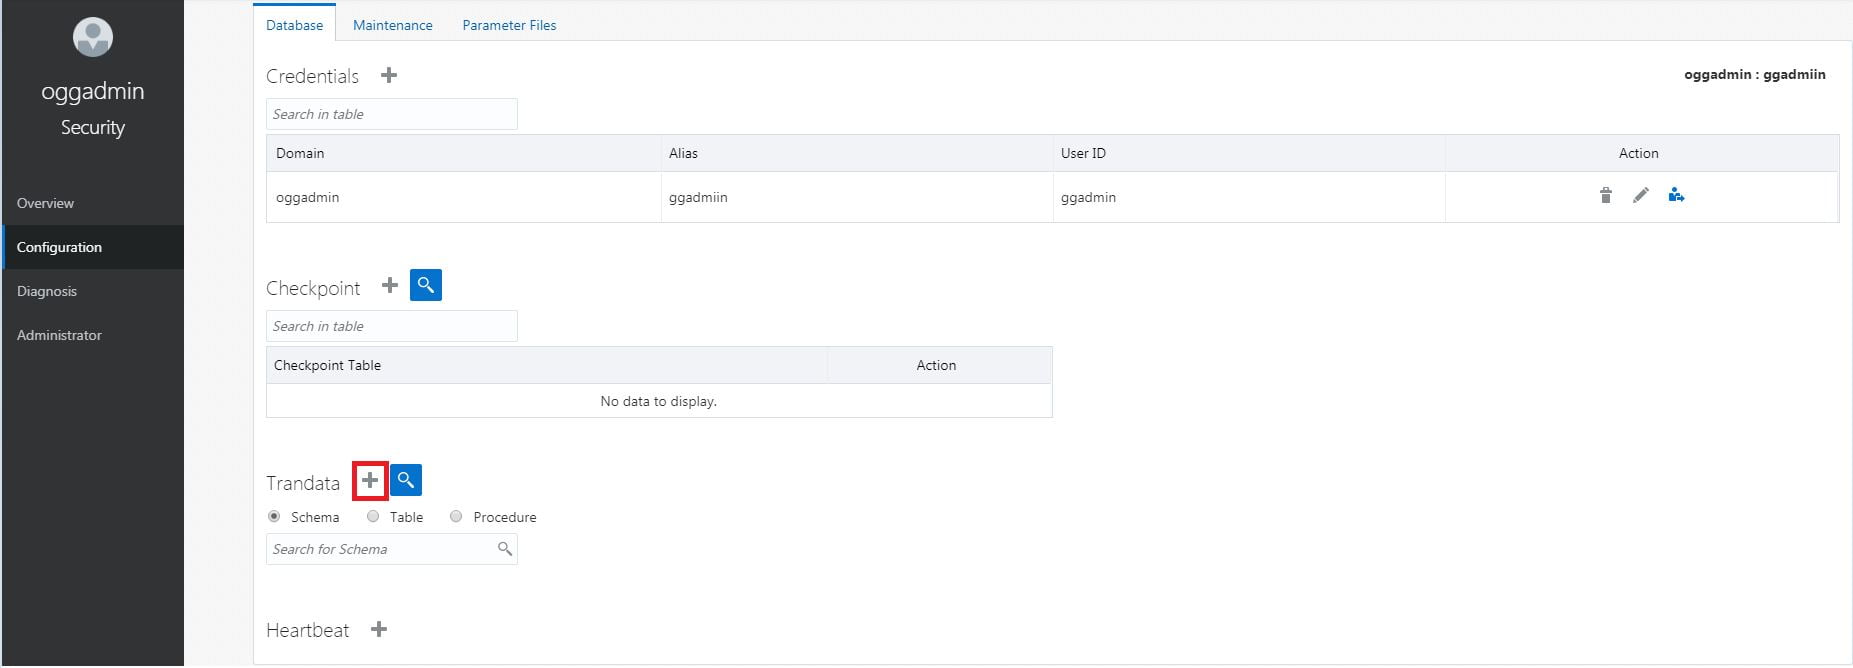
8. Before proceeding with performing DML operations. We need to enable supplemental logging at table level. So stop the process and add schematrandata for schema source.
To enable trandata, Click on Application Navigation->Configuration->user icon on right side
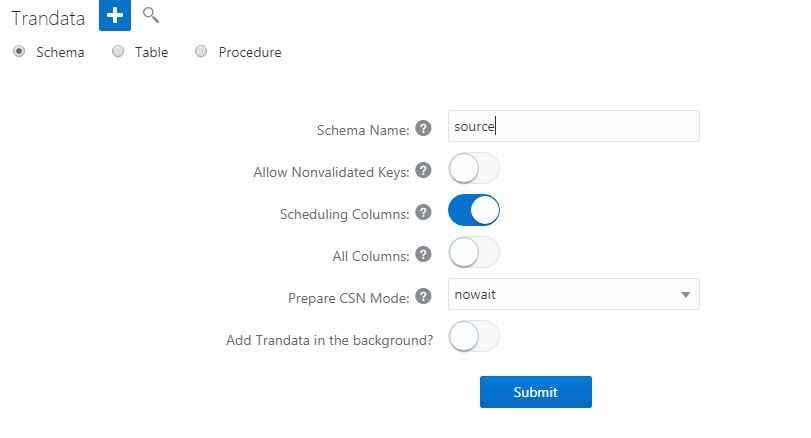
9. Enter source schema and click submit
In the notifications icons, you will see the trandata added to schema source
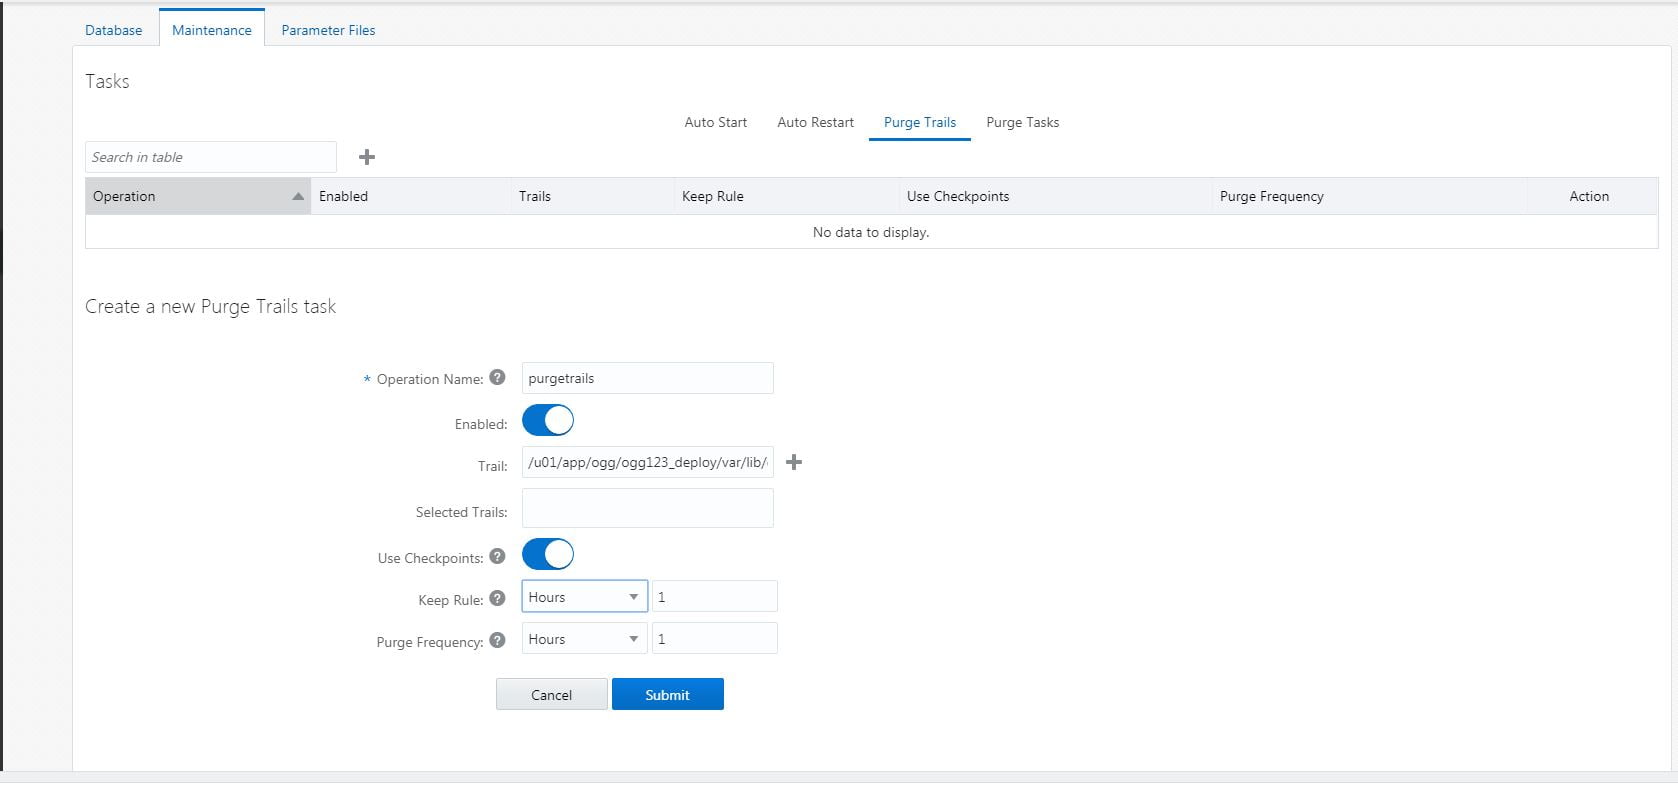
10. You can configure the autorestart, autostart, purge trail files in maintenance and edit parameter files
——————————————————–ADD DISTRIBUTION SERVER——————————————————–
In the Service Manager console, click the Distribution Server
Click the Plus symbol (+) to create the distribution server

Add the pump details and click the button “Create and Run”
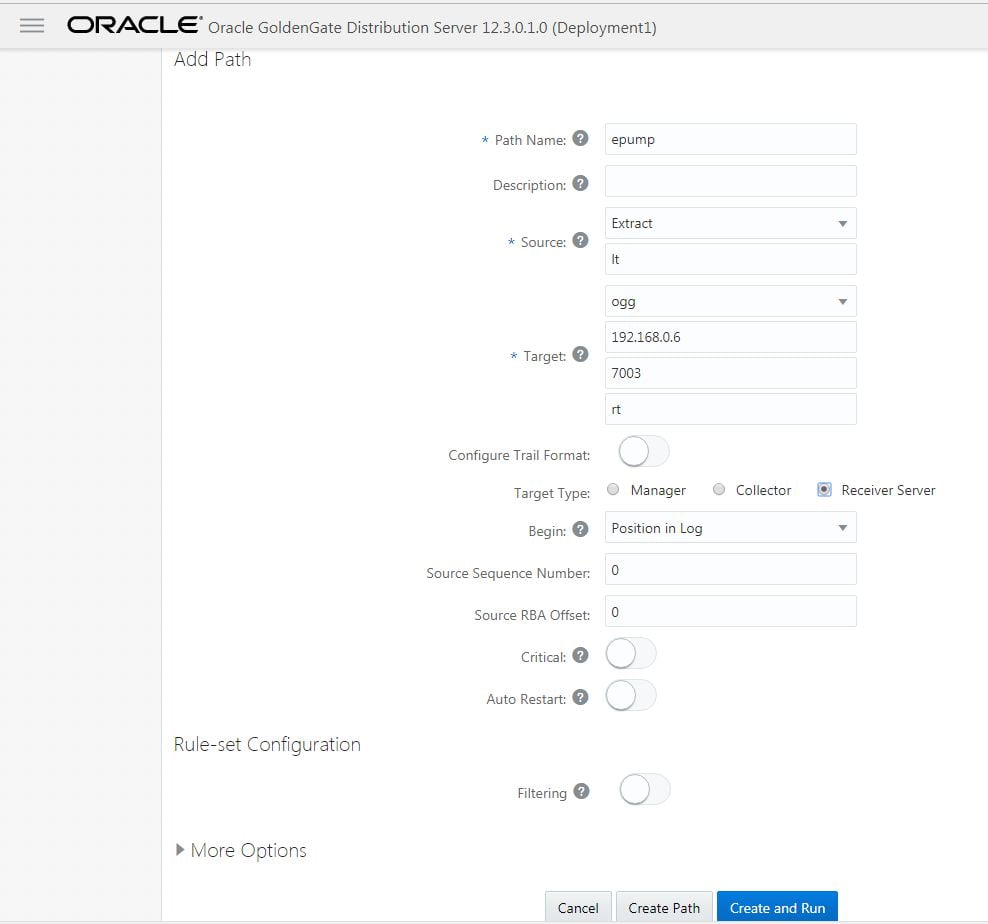
Now the pump is added and it will be received by Receiver server running on port 7003.

In the Service Manager console, click the Receiver Server

——————————————————–ADDING REPLICAT PROCESS——————————————————–
1.Already we have opened the Administration Server.
2. Click on the + symbol to add a Replicat process.

3. Select the type of Replicat process need to be added.

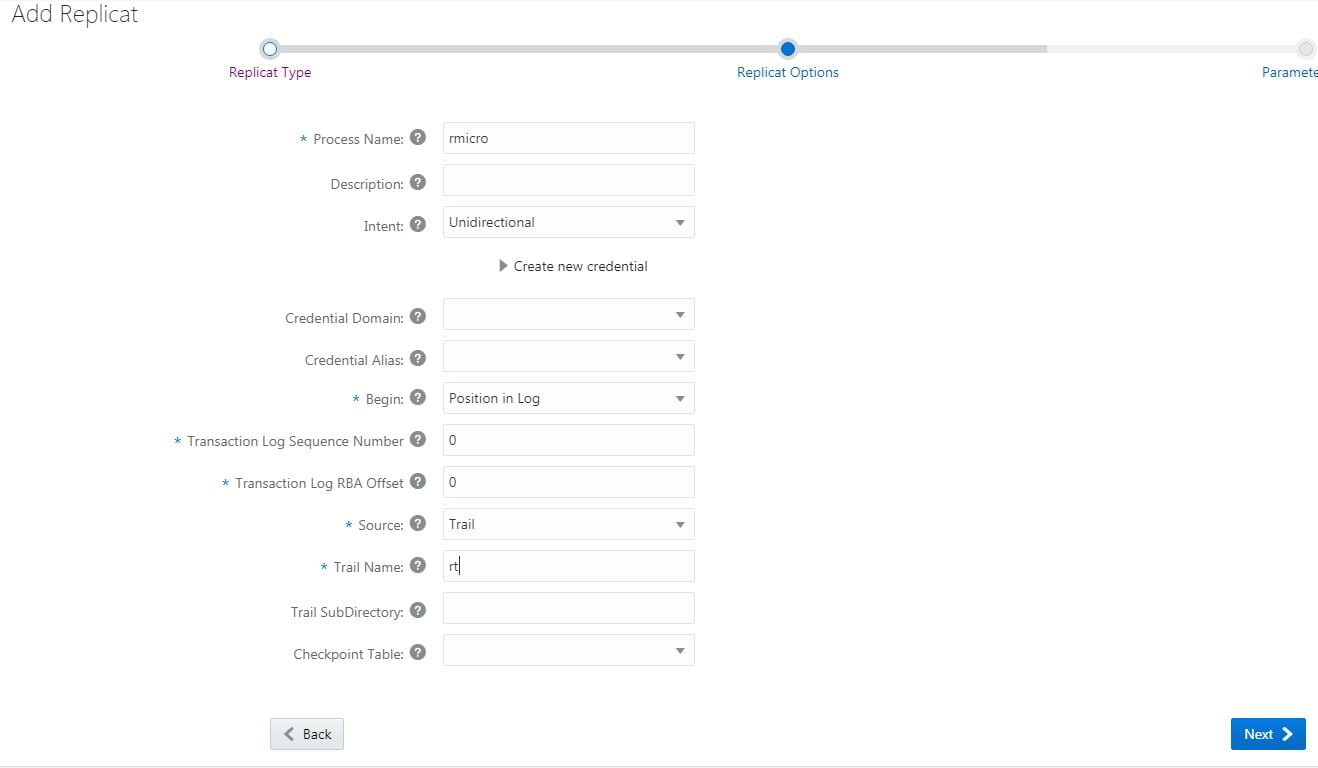
4. Add the details for the Replicat process. Here the replicat process name is RMICRO.
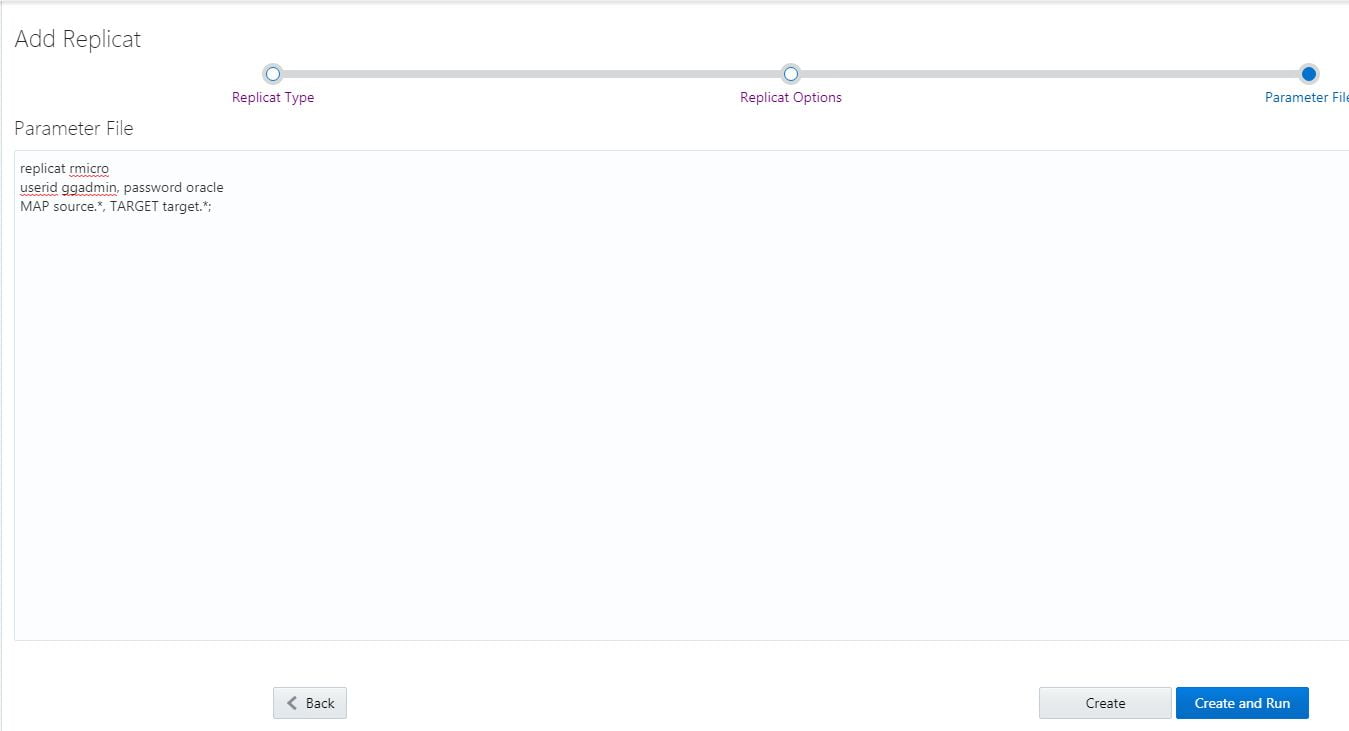
5. Modify the parameters respectively and click the button “Create and Run”.
You can see the replicat process is added and it is running.
——————————————————–REPLICATION TESTING——————————————————–
Create a table on source and target and load some data to it.


Insert rows to the table in the source.
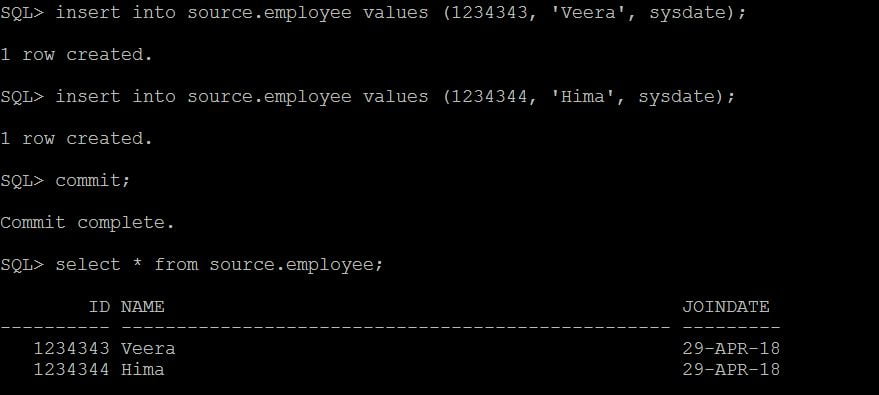
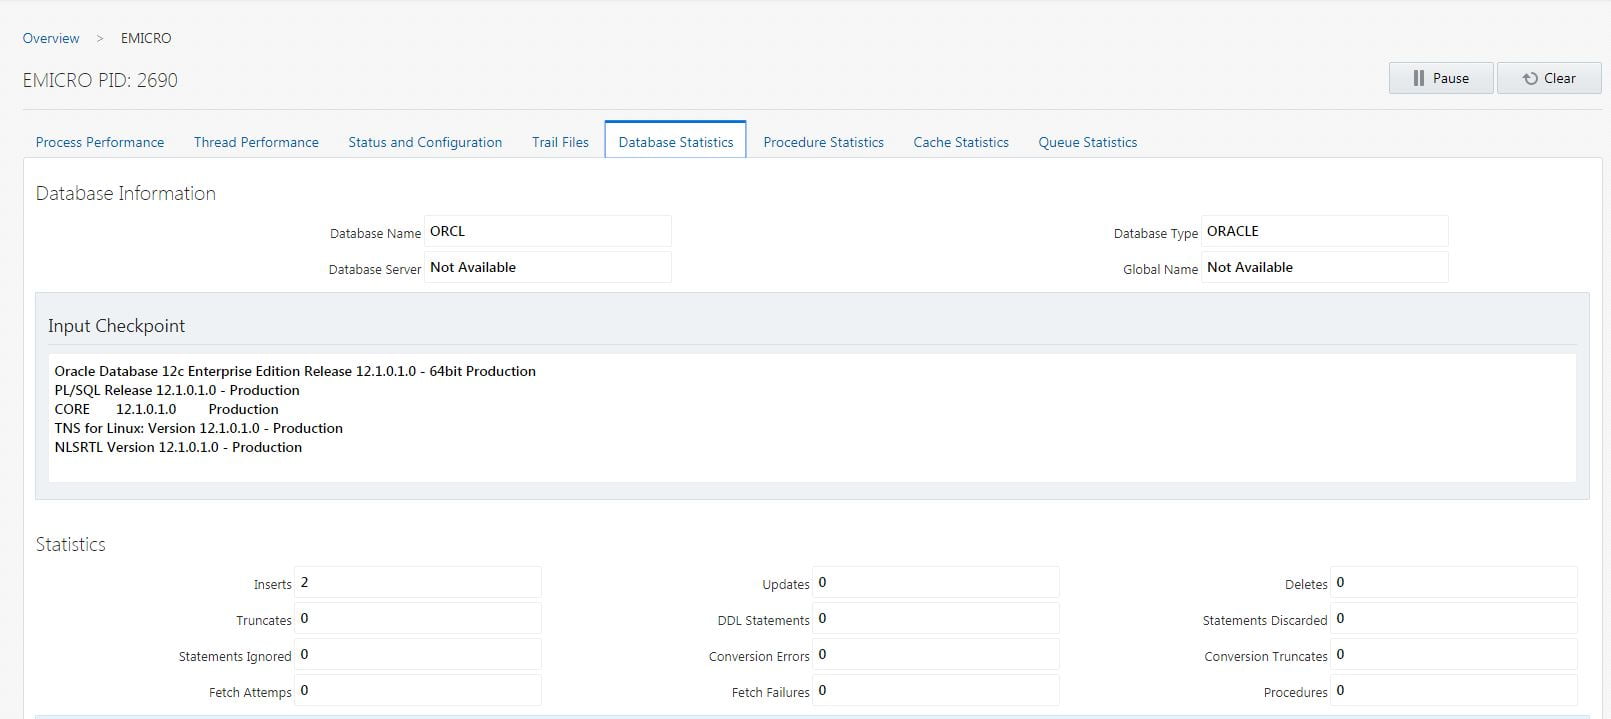
Open the Service Manager console and click the Performance Metrics Server to check the database statistics.
Click on the Database Statistics tab in the top to check the statistics. You could see there were 2 INSERTS.
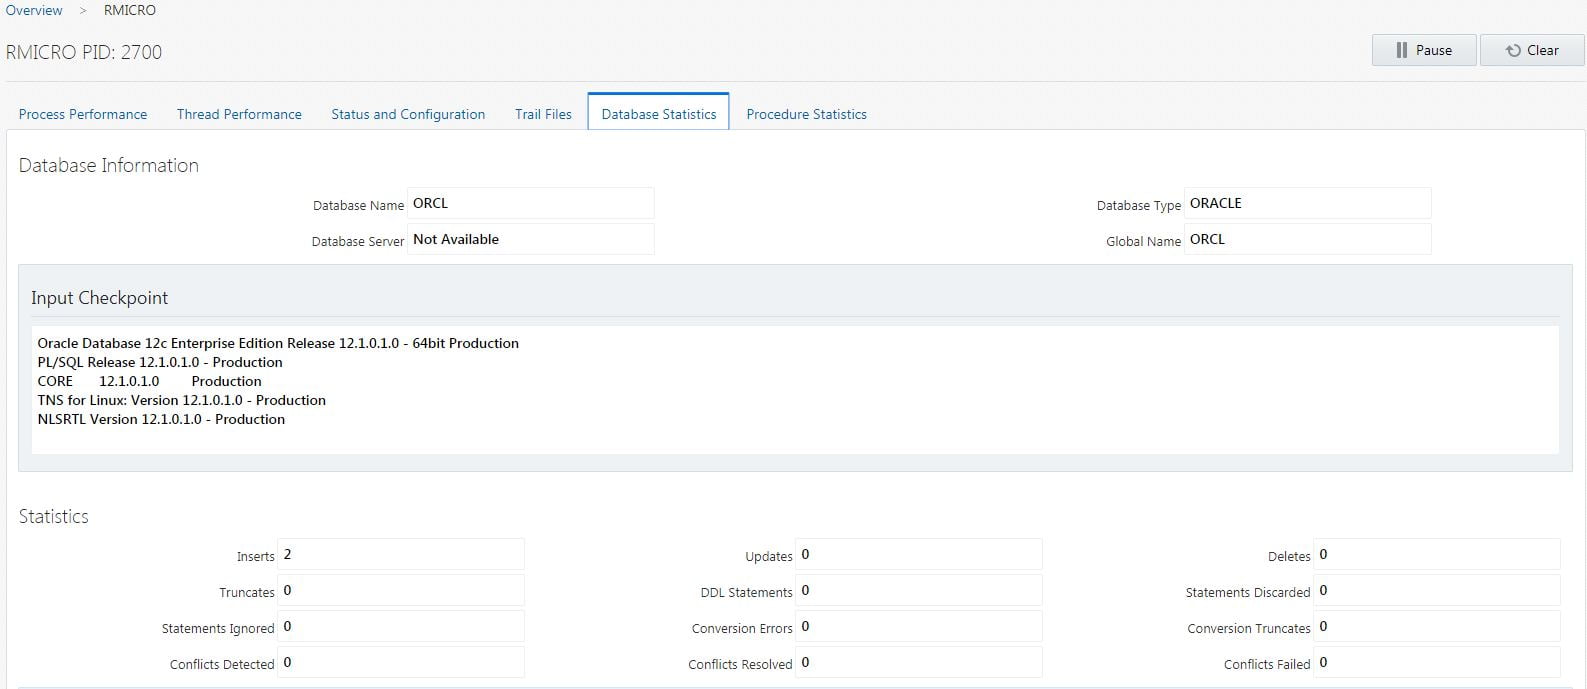
Now click the Replicat process.

You can again see the 2 INSERT operations under the Database Statistics.
Now the check the Target table if the row got replicated.

Yes it is replicated.
In this article, I have explained on how to create Classic Extract and Classic Replicat. Similarly, we can also create Integrated Extract/Replicat, Parallel Replicat (newly added in OGG 12.3)
Hope this article helped you.
Cheers 🙂


















 Total Users : 1842340